Now that the cabinets are up, we need paint! Paint on those beautiful cabinets, crown moldings, walls, and ceiling! That’s a lot of paint! I suggest bringing as many samples as you want home. Then, check out the lighting in your space with each of the colors. We did that during the day and at night and were able to see some of the undertones you may not see at the store. Some have blue, yellow, reds…
 We fell in love with one that shined through brighter than the rest, Benjamin Moore Snowfall White OC-118. It’s a perfect white-white for our space, and I love the name! Reminds me of home! Our contractor is a Sherwin Williams guy, so we had it color matched in an acrylic semi-gloss. It’s such a glossy goodness; I will suggested it to all!
 Oh, and don’t they look gorgeous!! Below is a night picture of the cabinets drying.
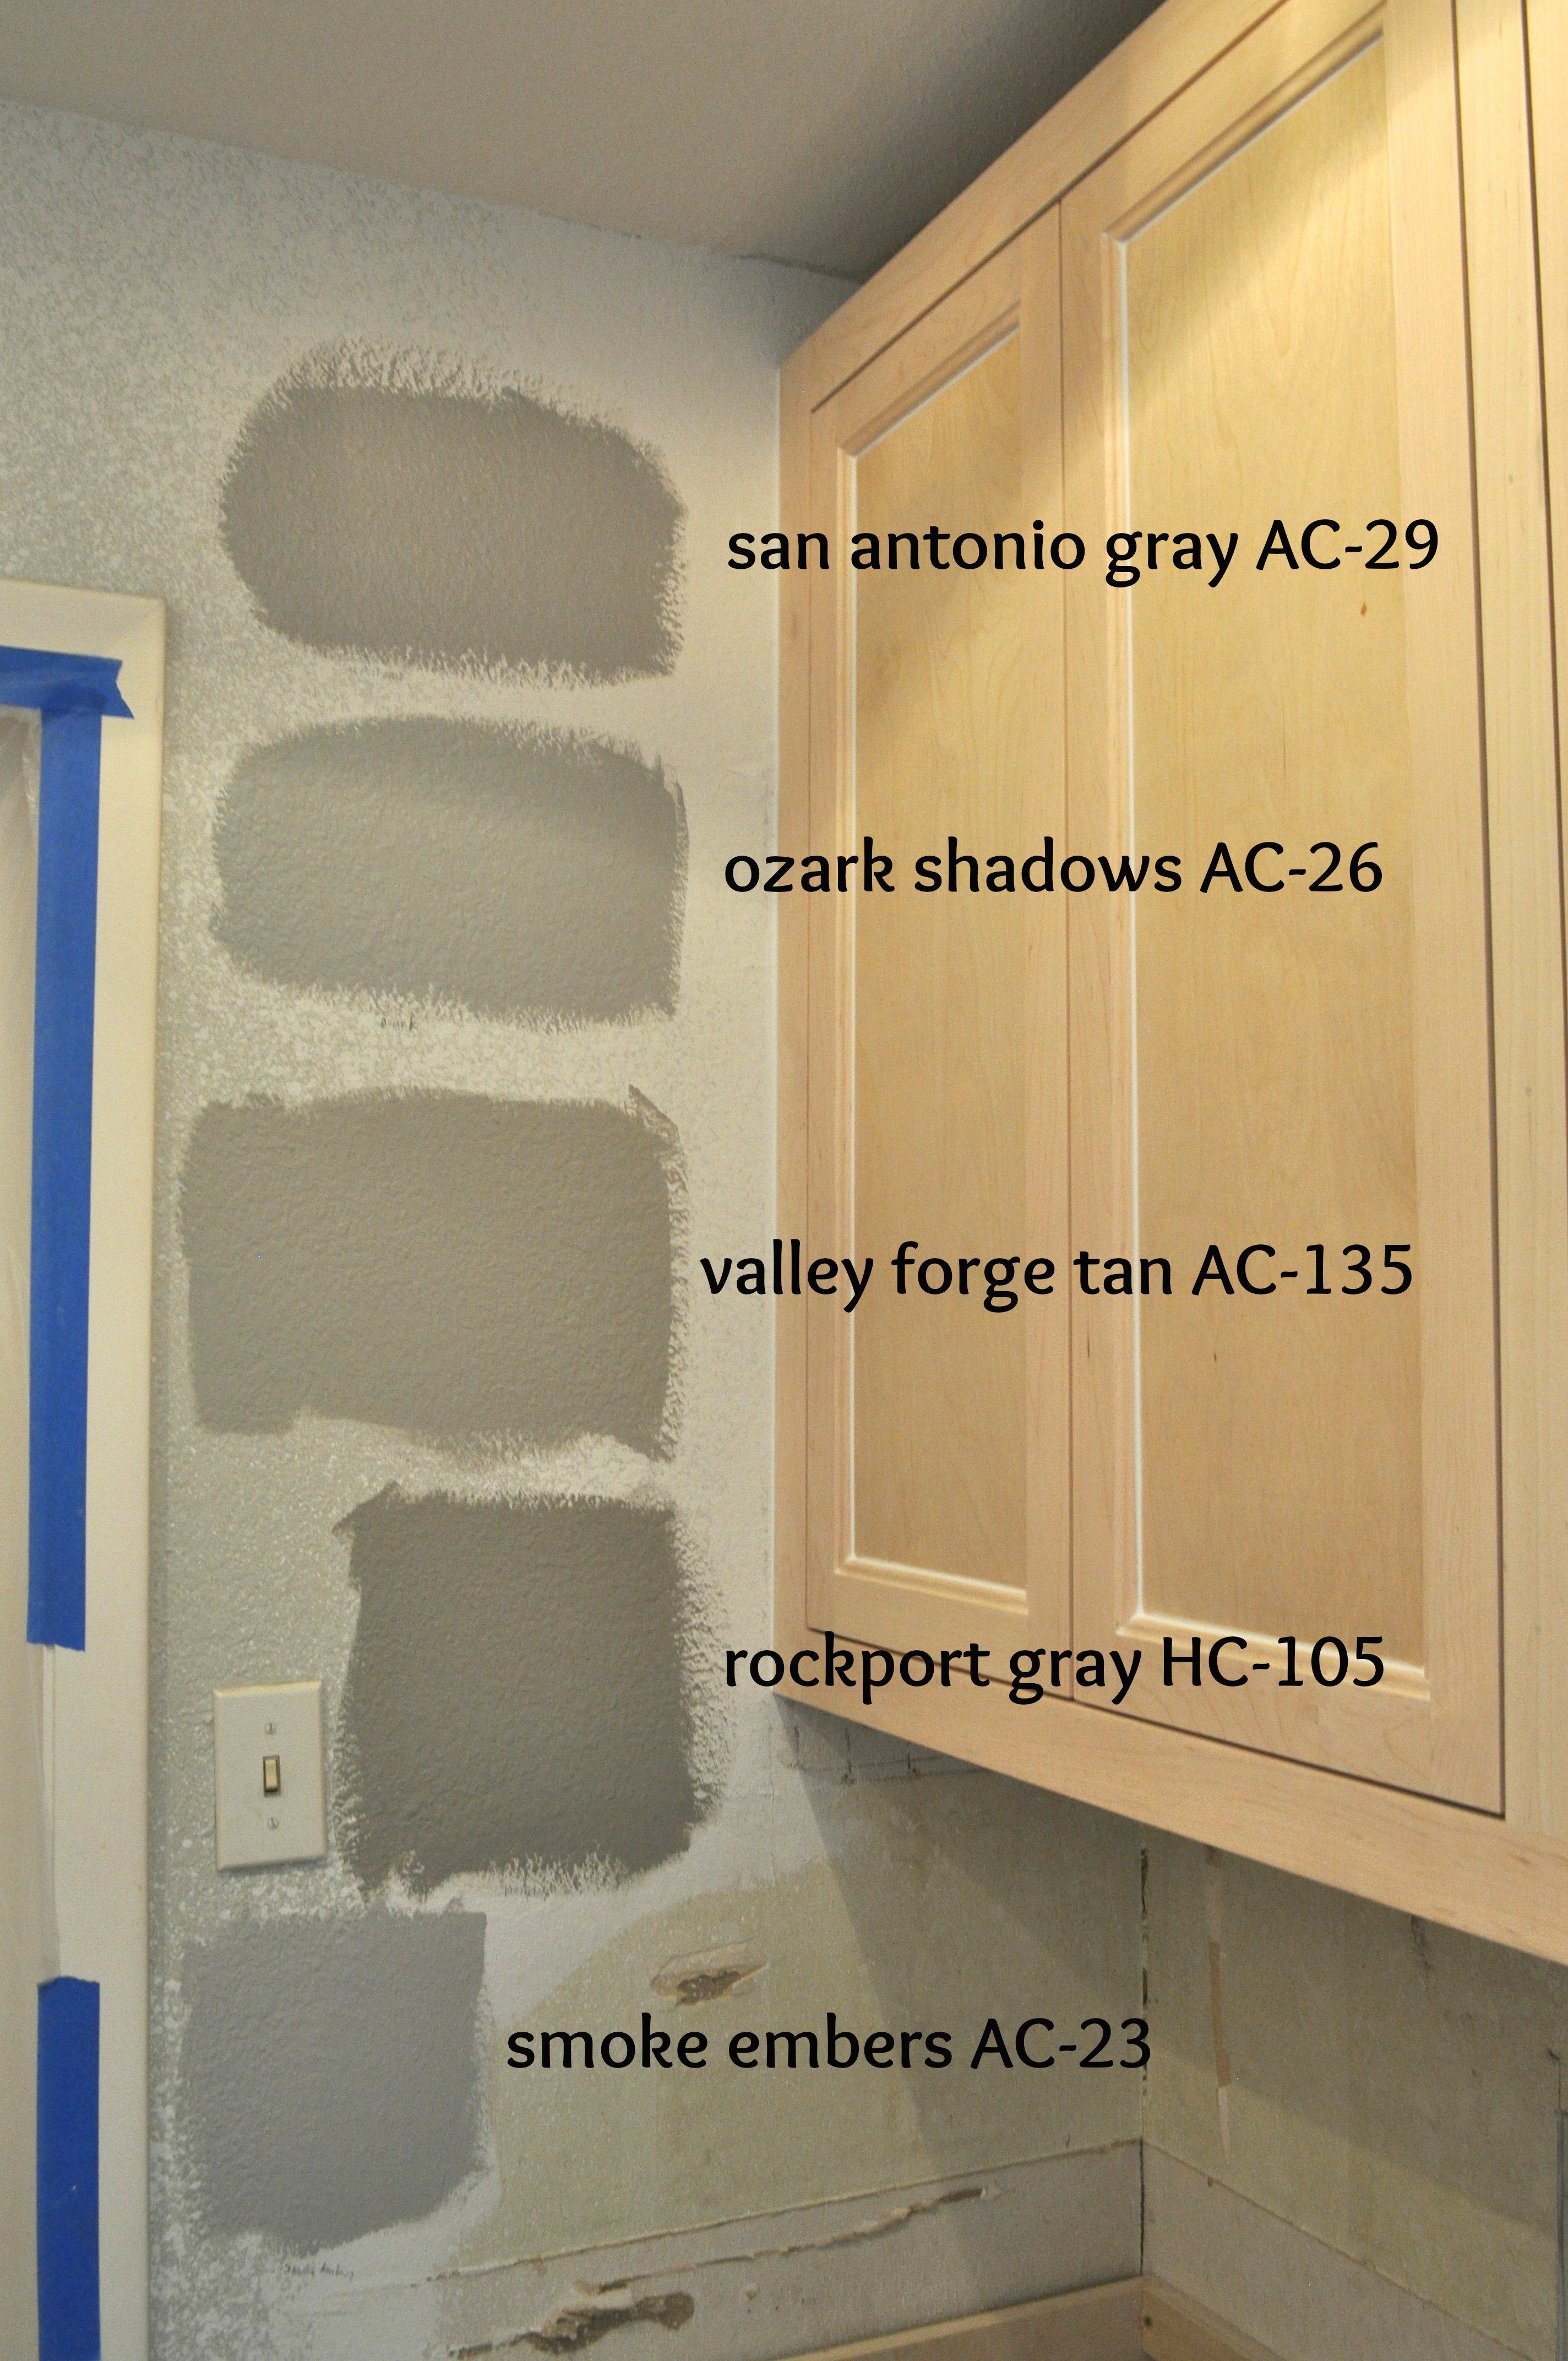
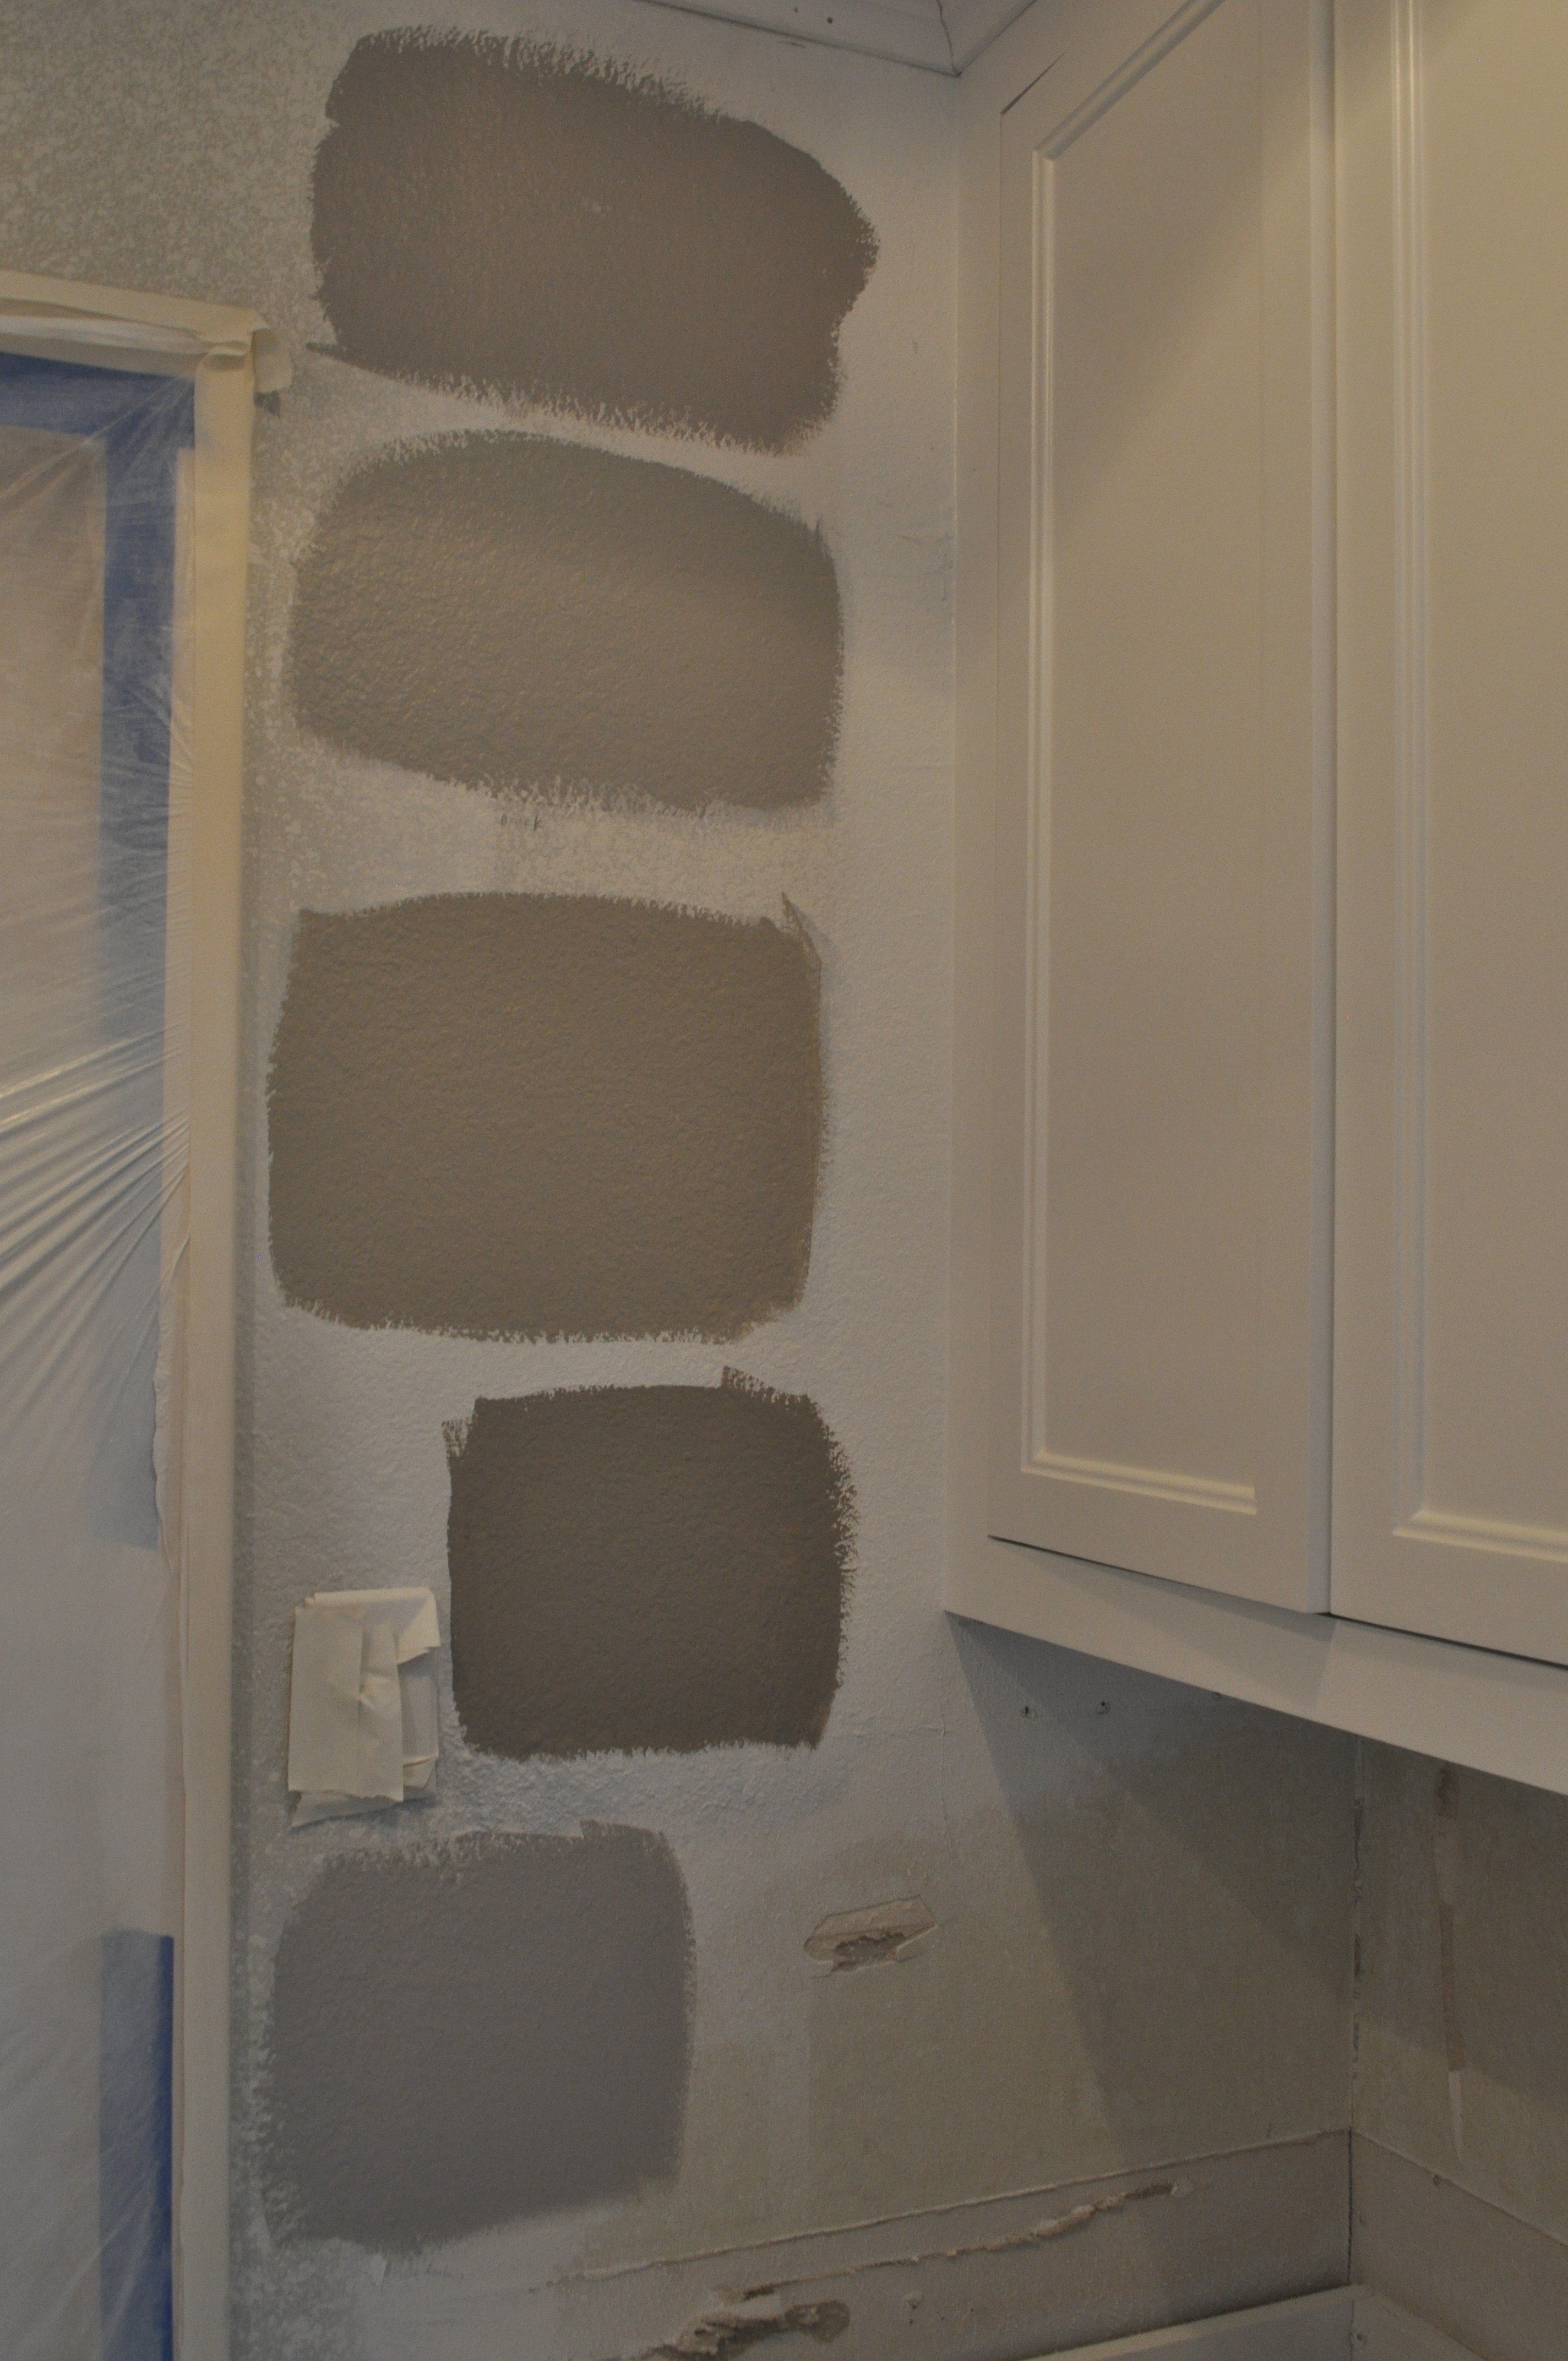
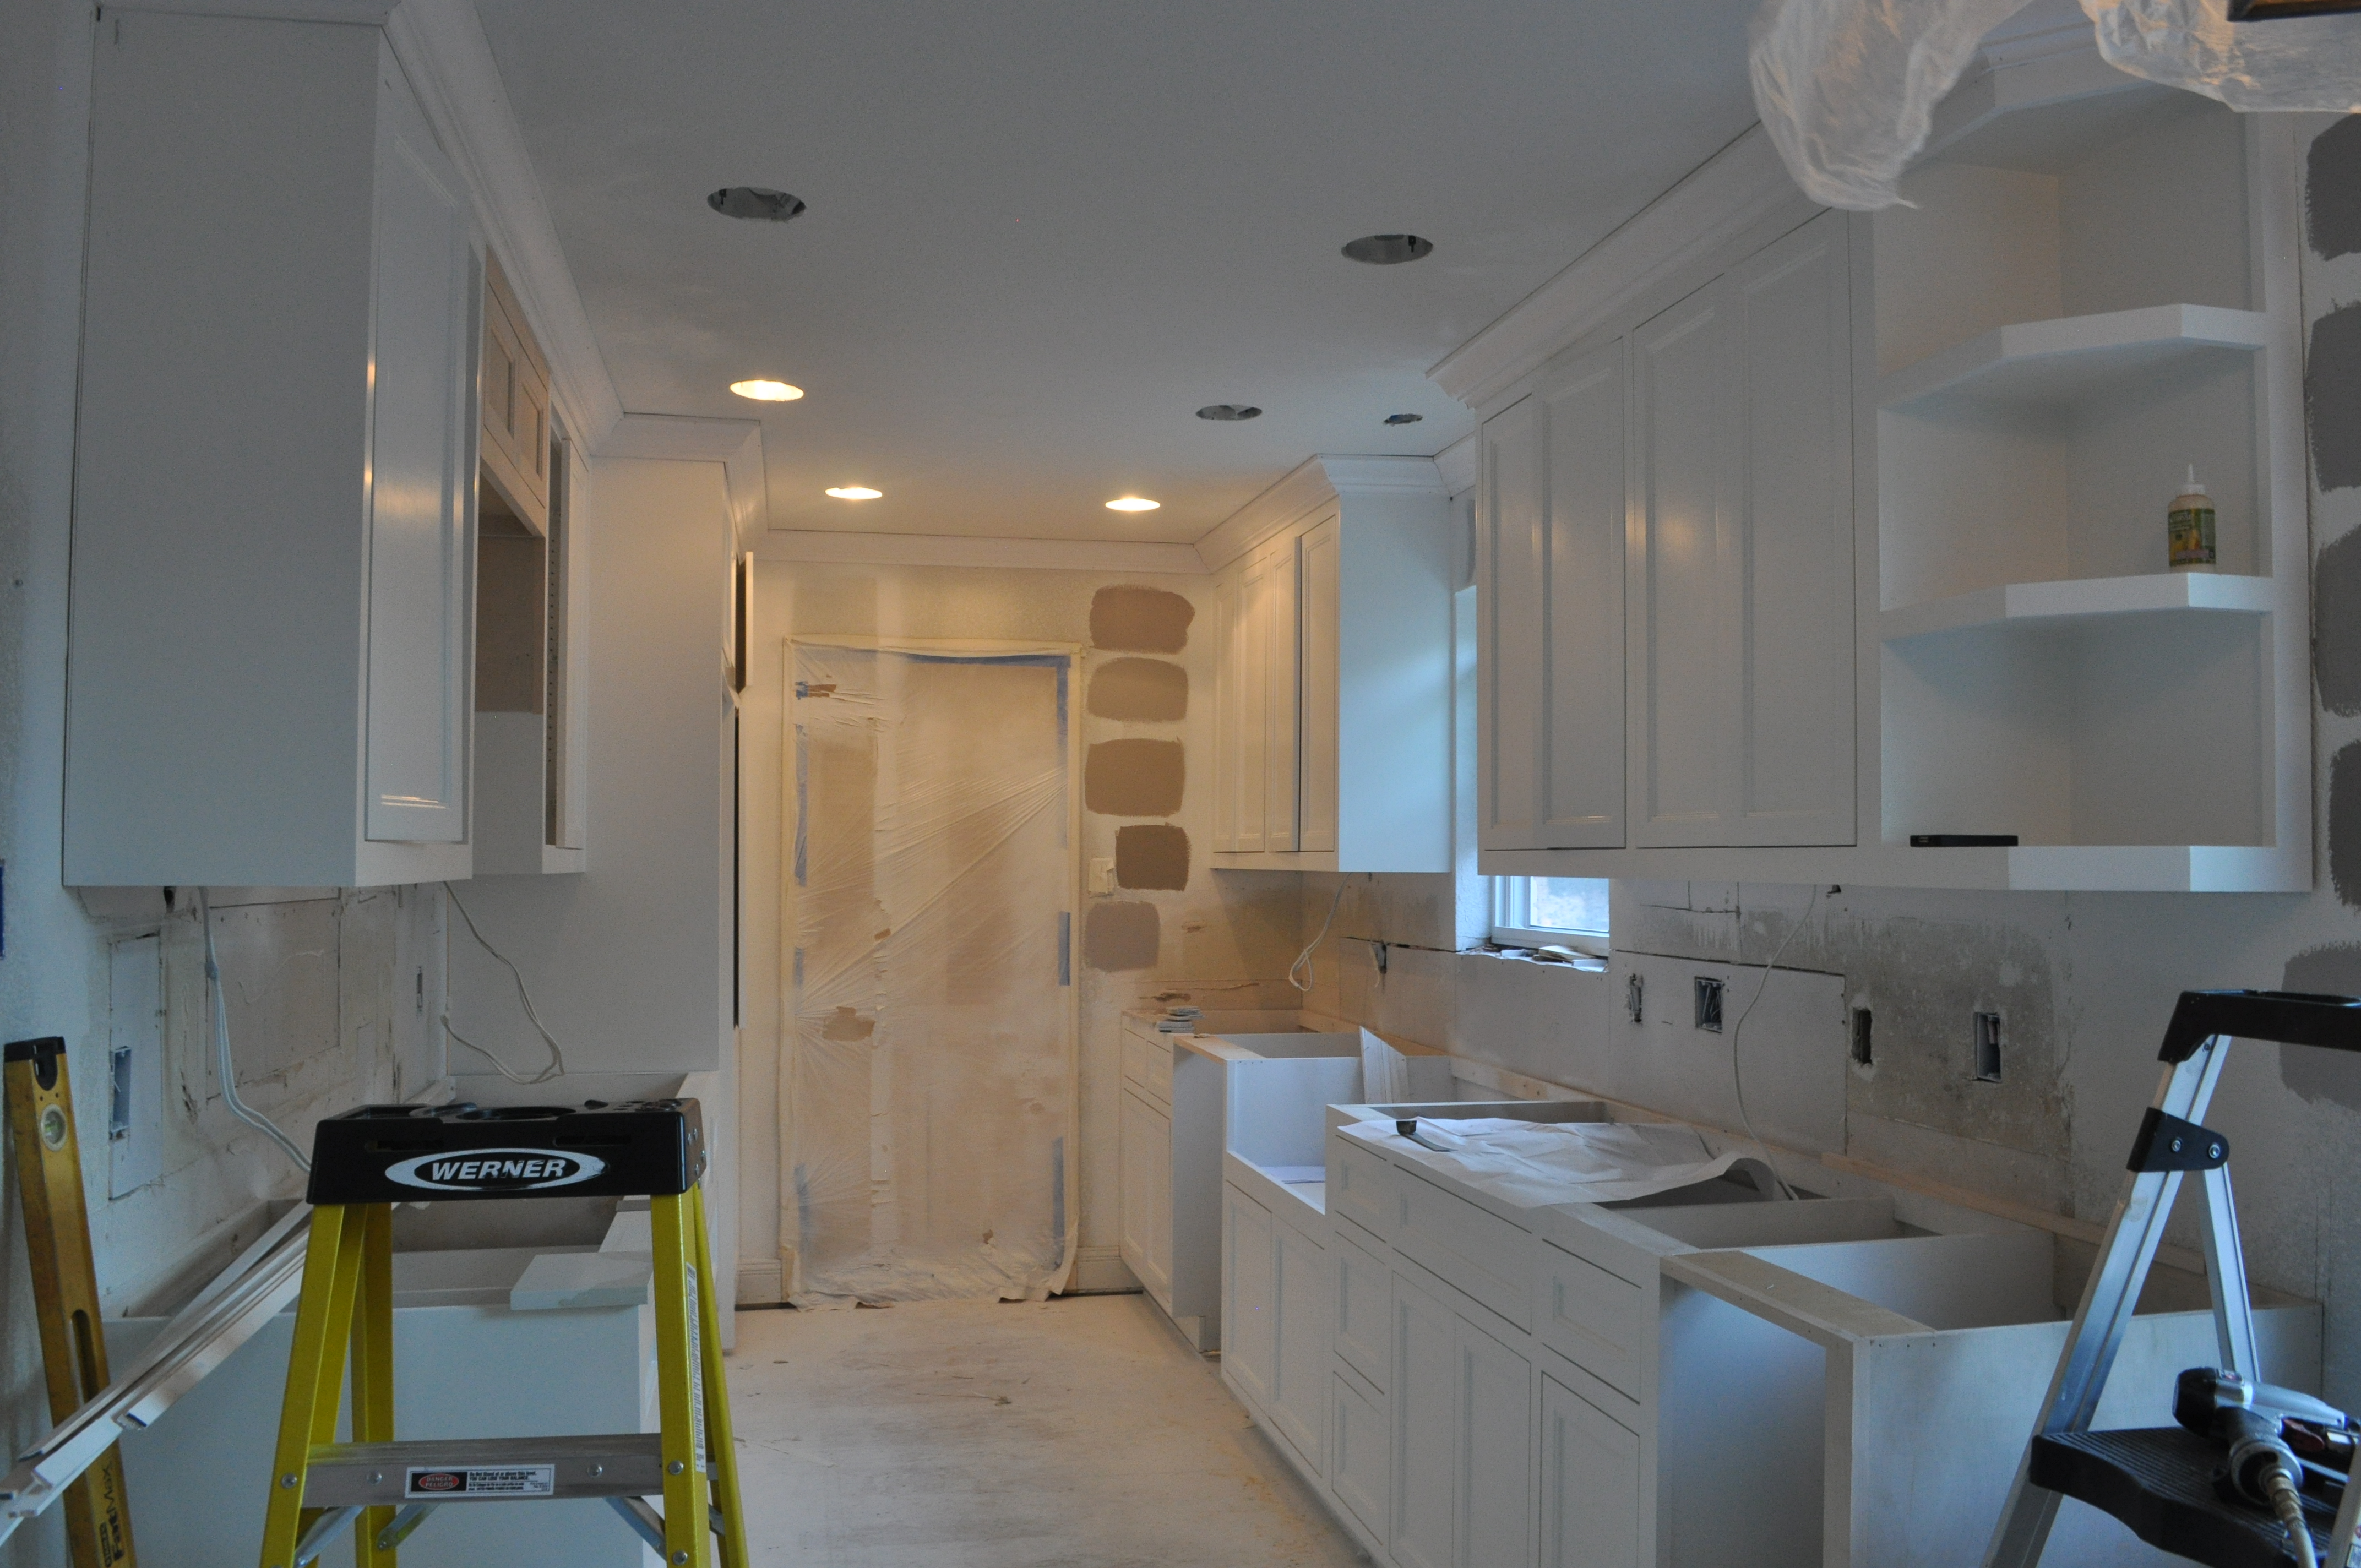
 We then moved on to the wall color! I bought a bunch of samples and painted those on the walls! We both liked Ozark Shadows AC-26, but I wanted a little less bold/dark color with the white kitchen… So, we went a step down on the color palette with Harbor Gray AC-25. Here’s the samples with both wood and white cabinets.
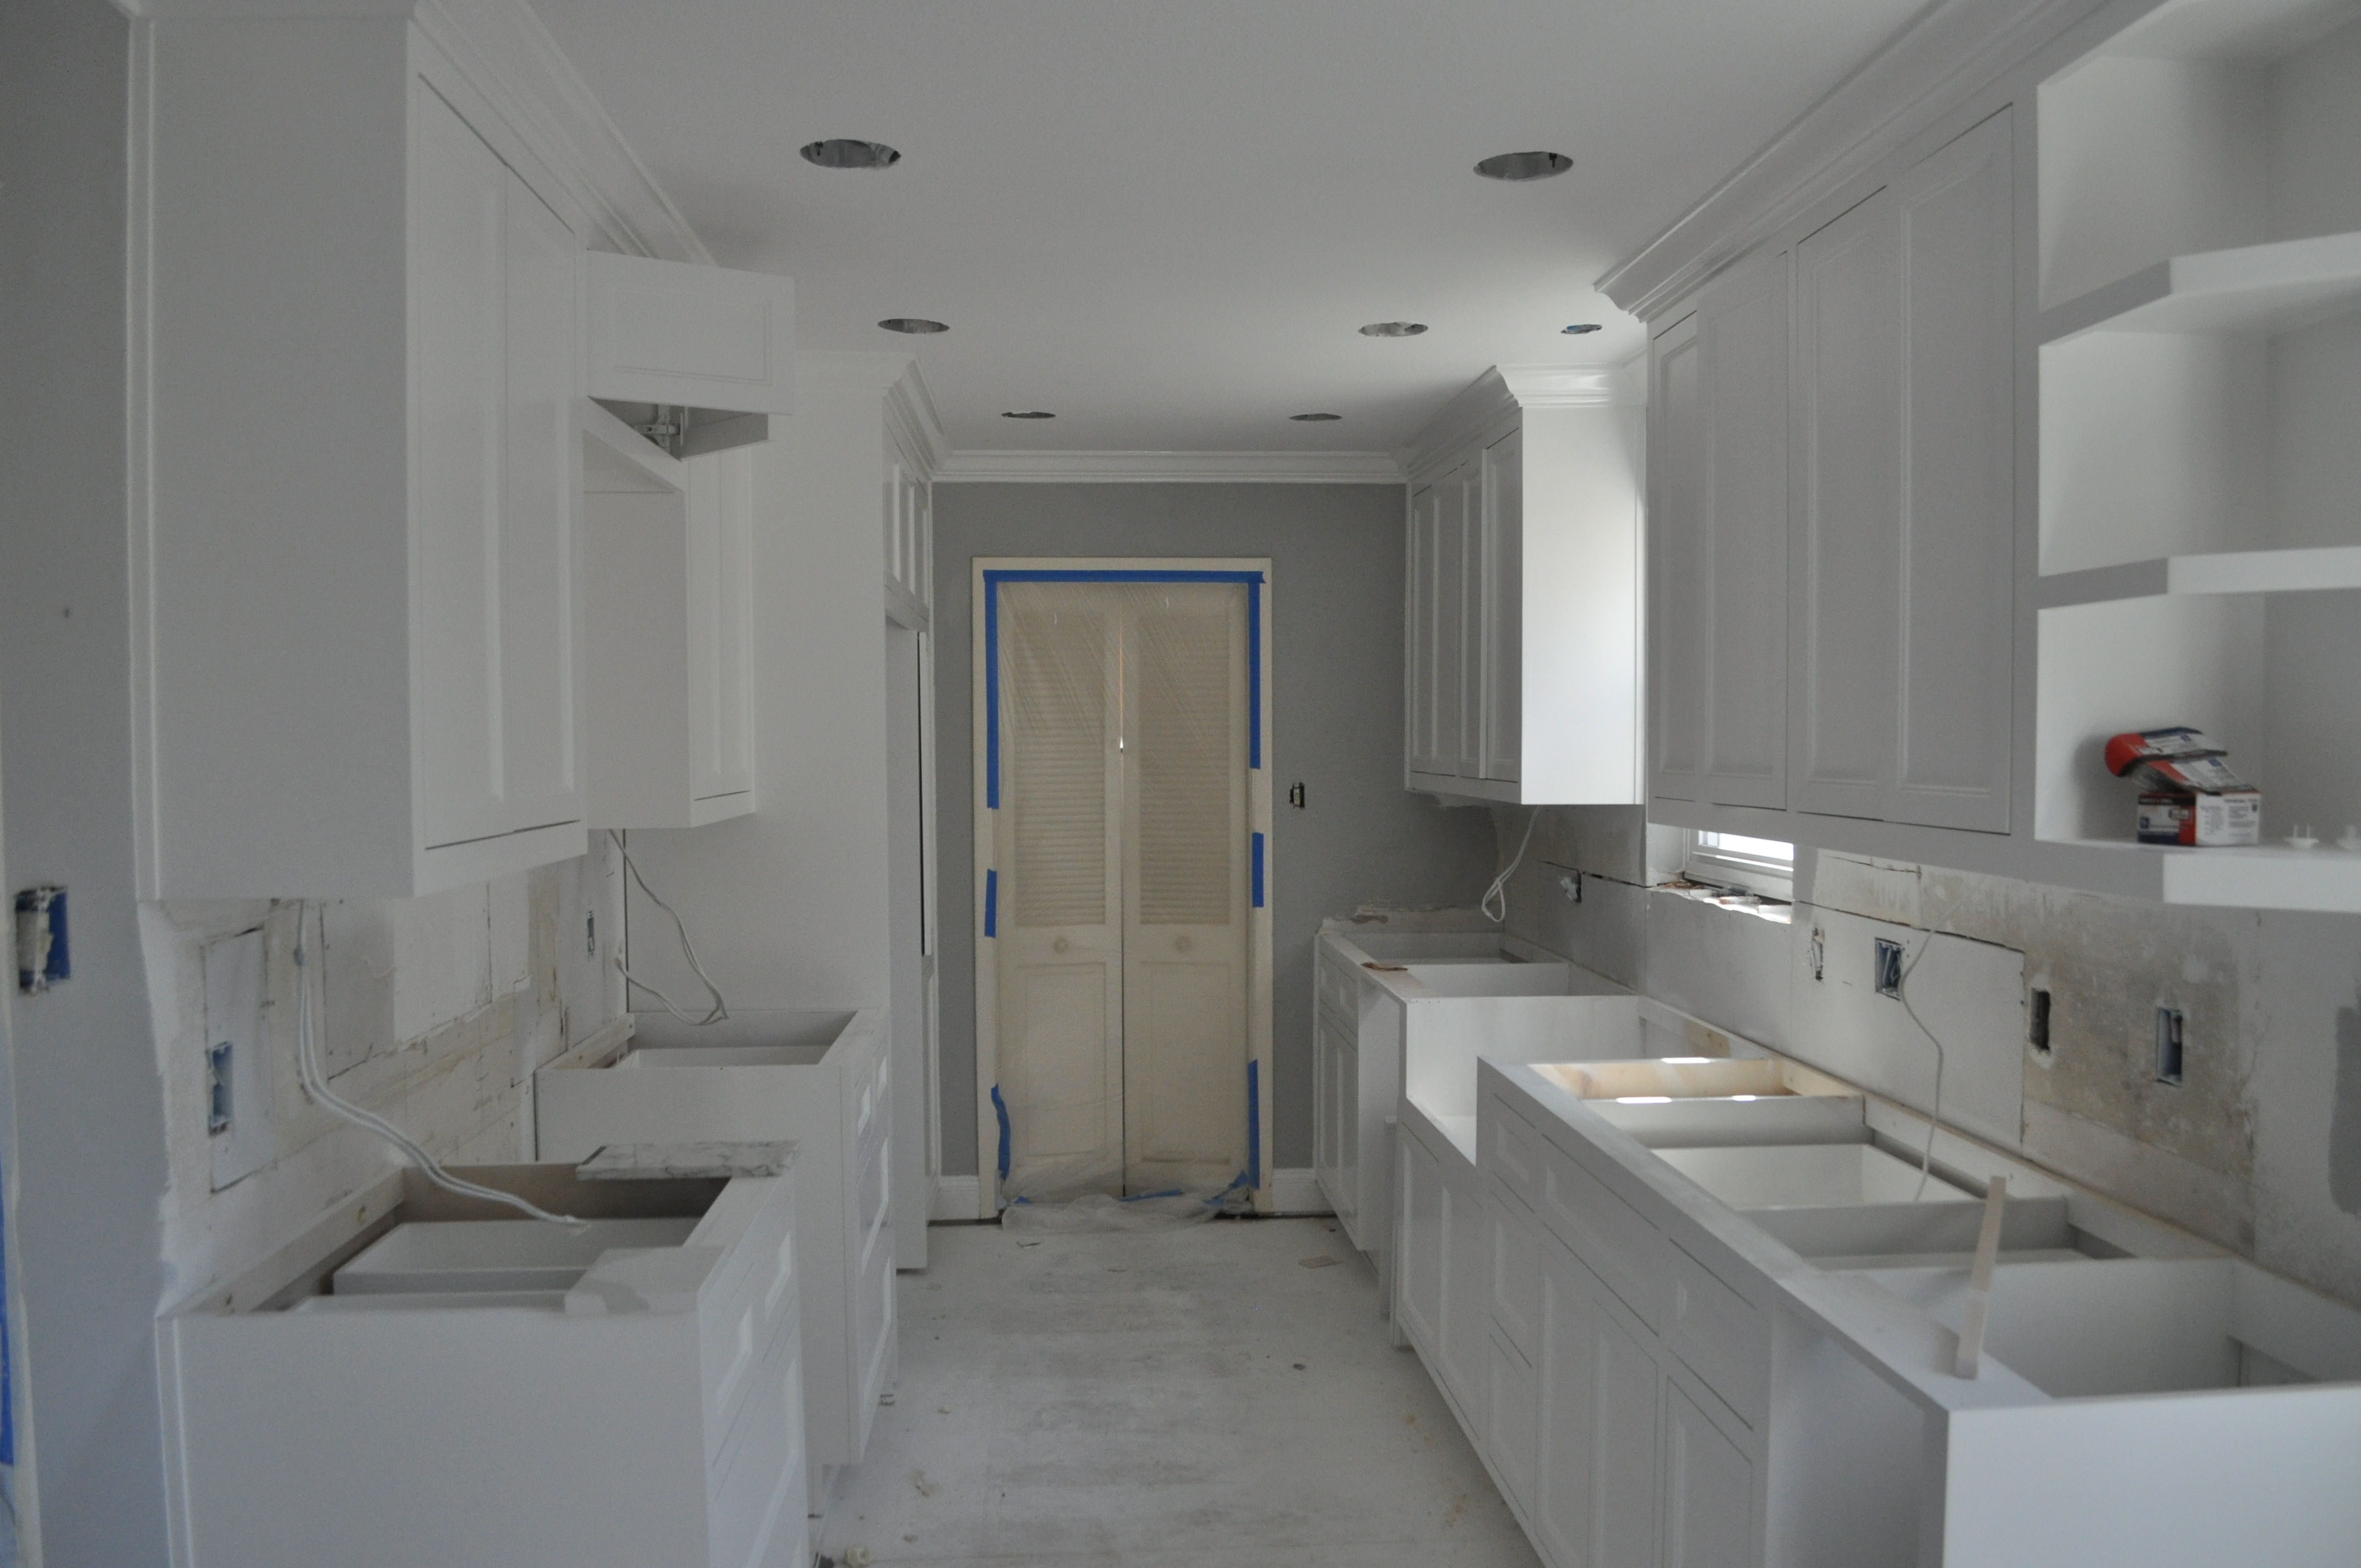
 Then the crown molding came in!! It was an easy decision to do the crown molding the same color as the cabinets. Glossy Benjamin Moore Snowfall White OC-118.
 Lastly that ceiling, that new ceiling with all those new lights, gets some paint, too!! We went with a standard flat ceiling paint from B. Moore, which we had leftover from our other projects. We saved a little cash, too!
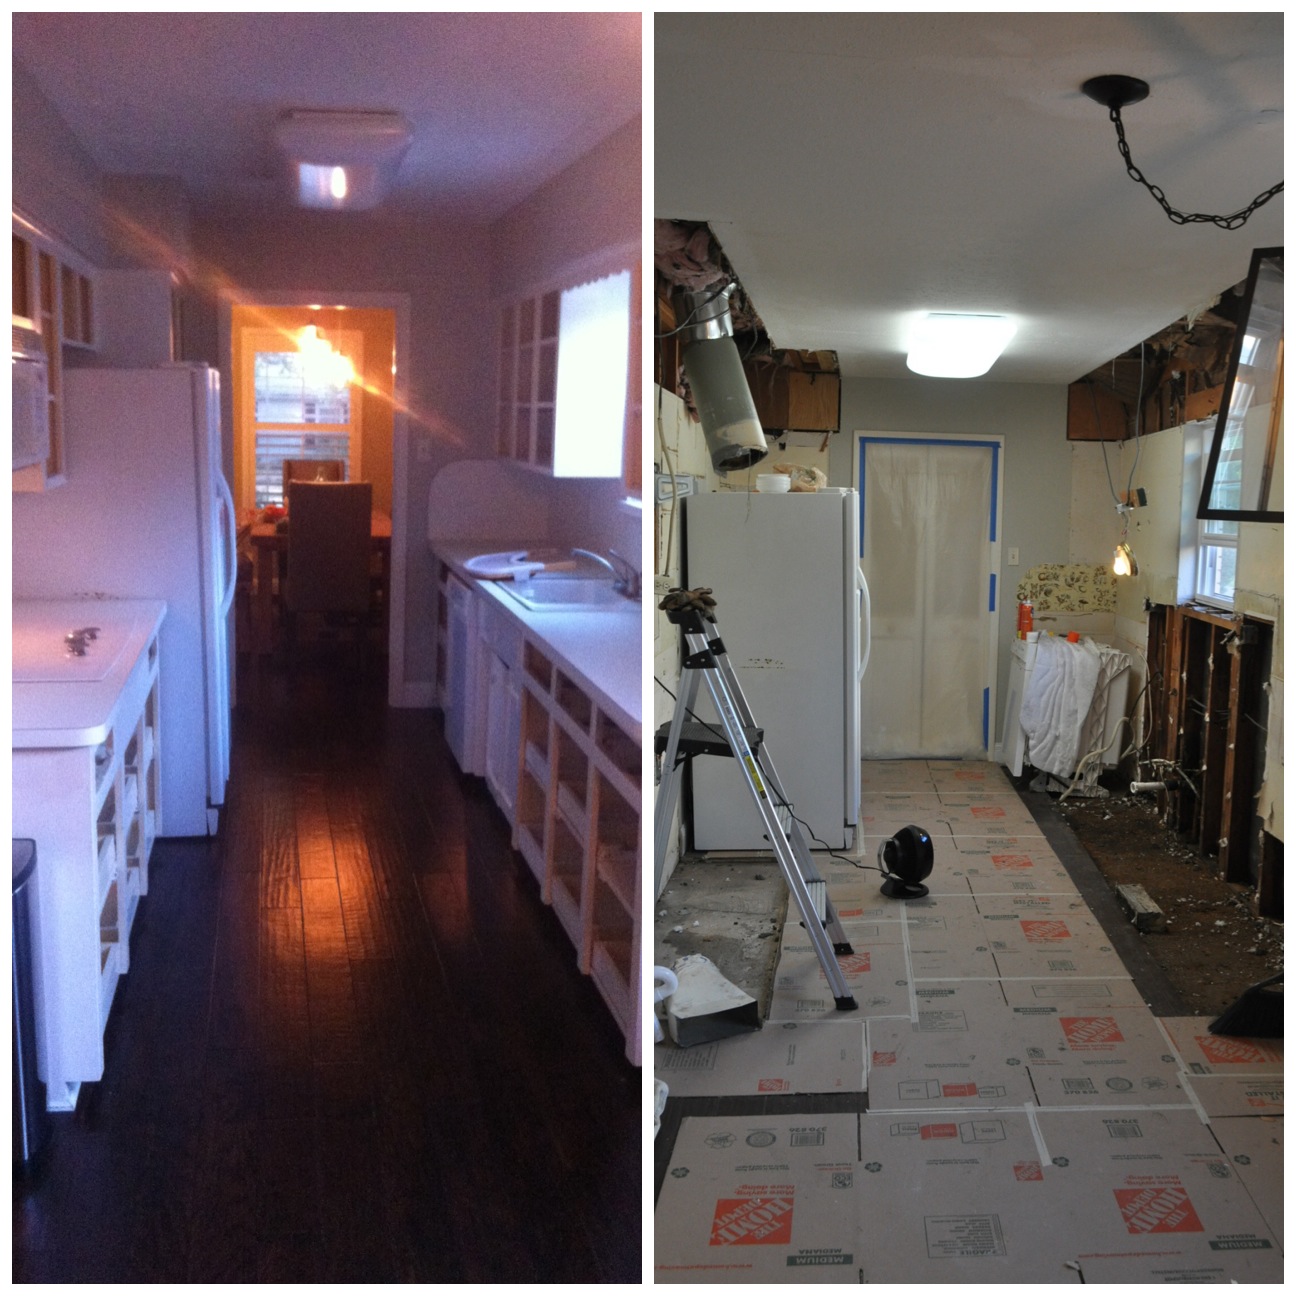
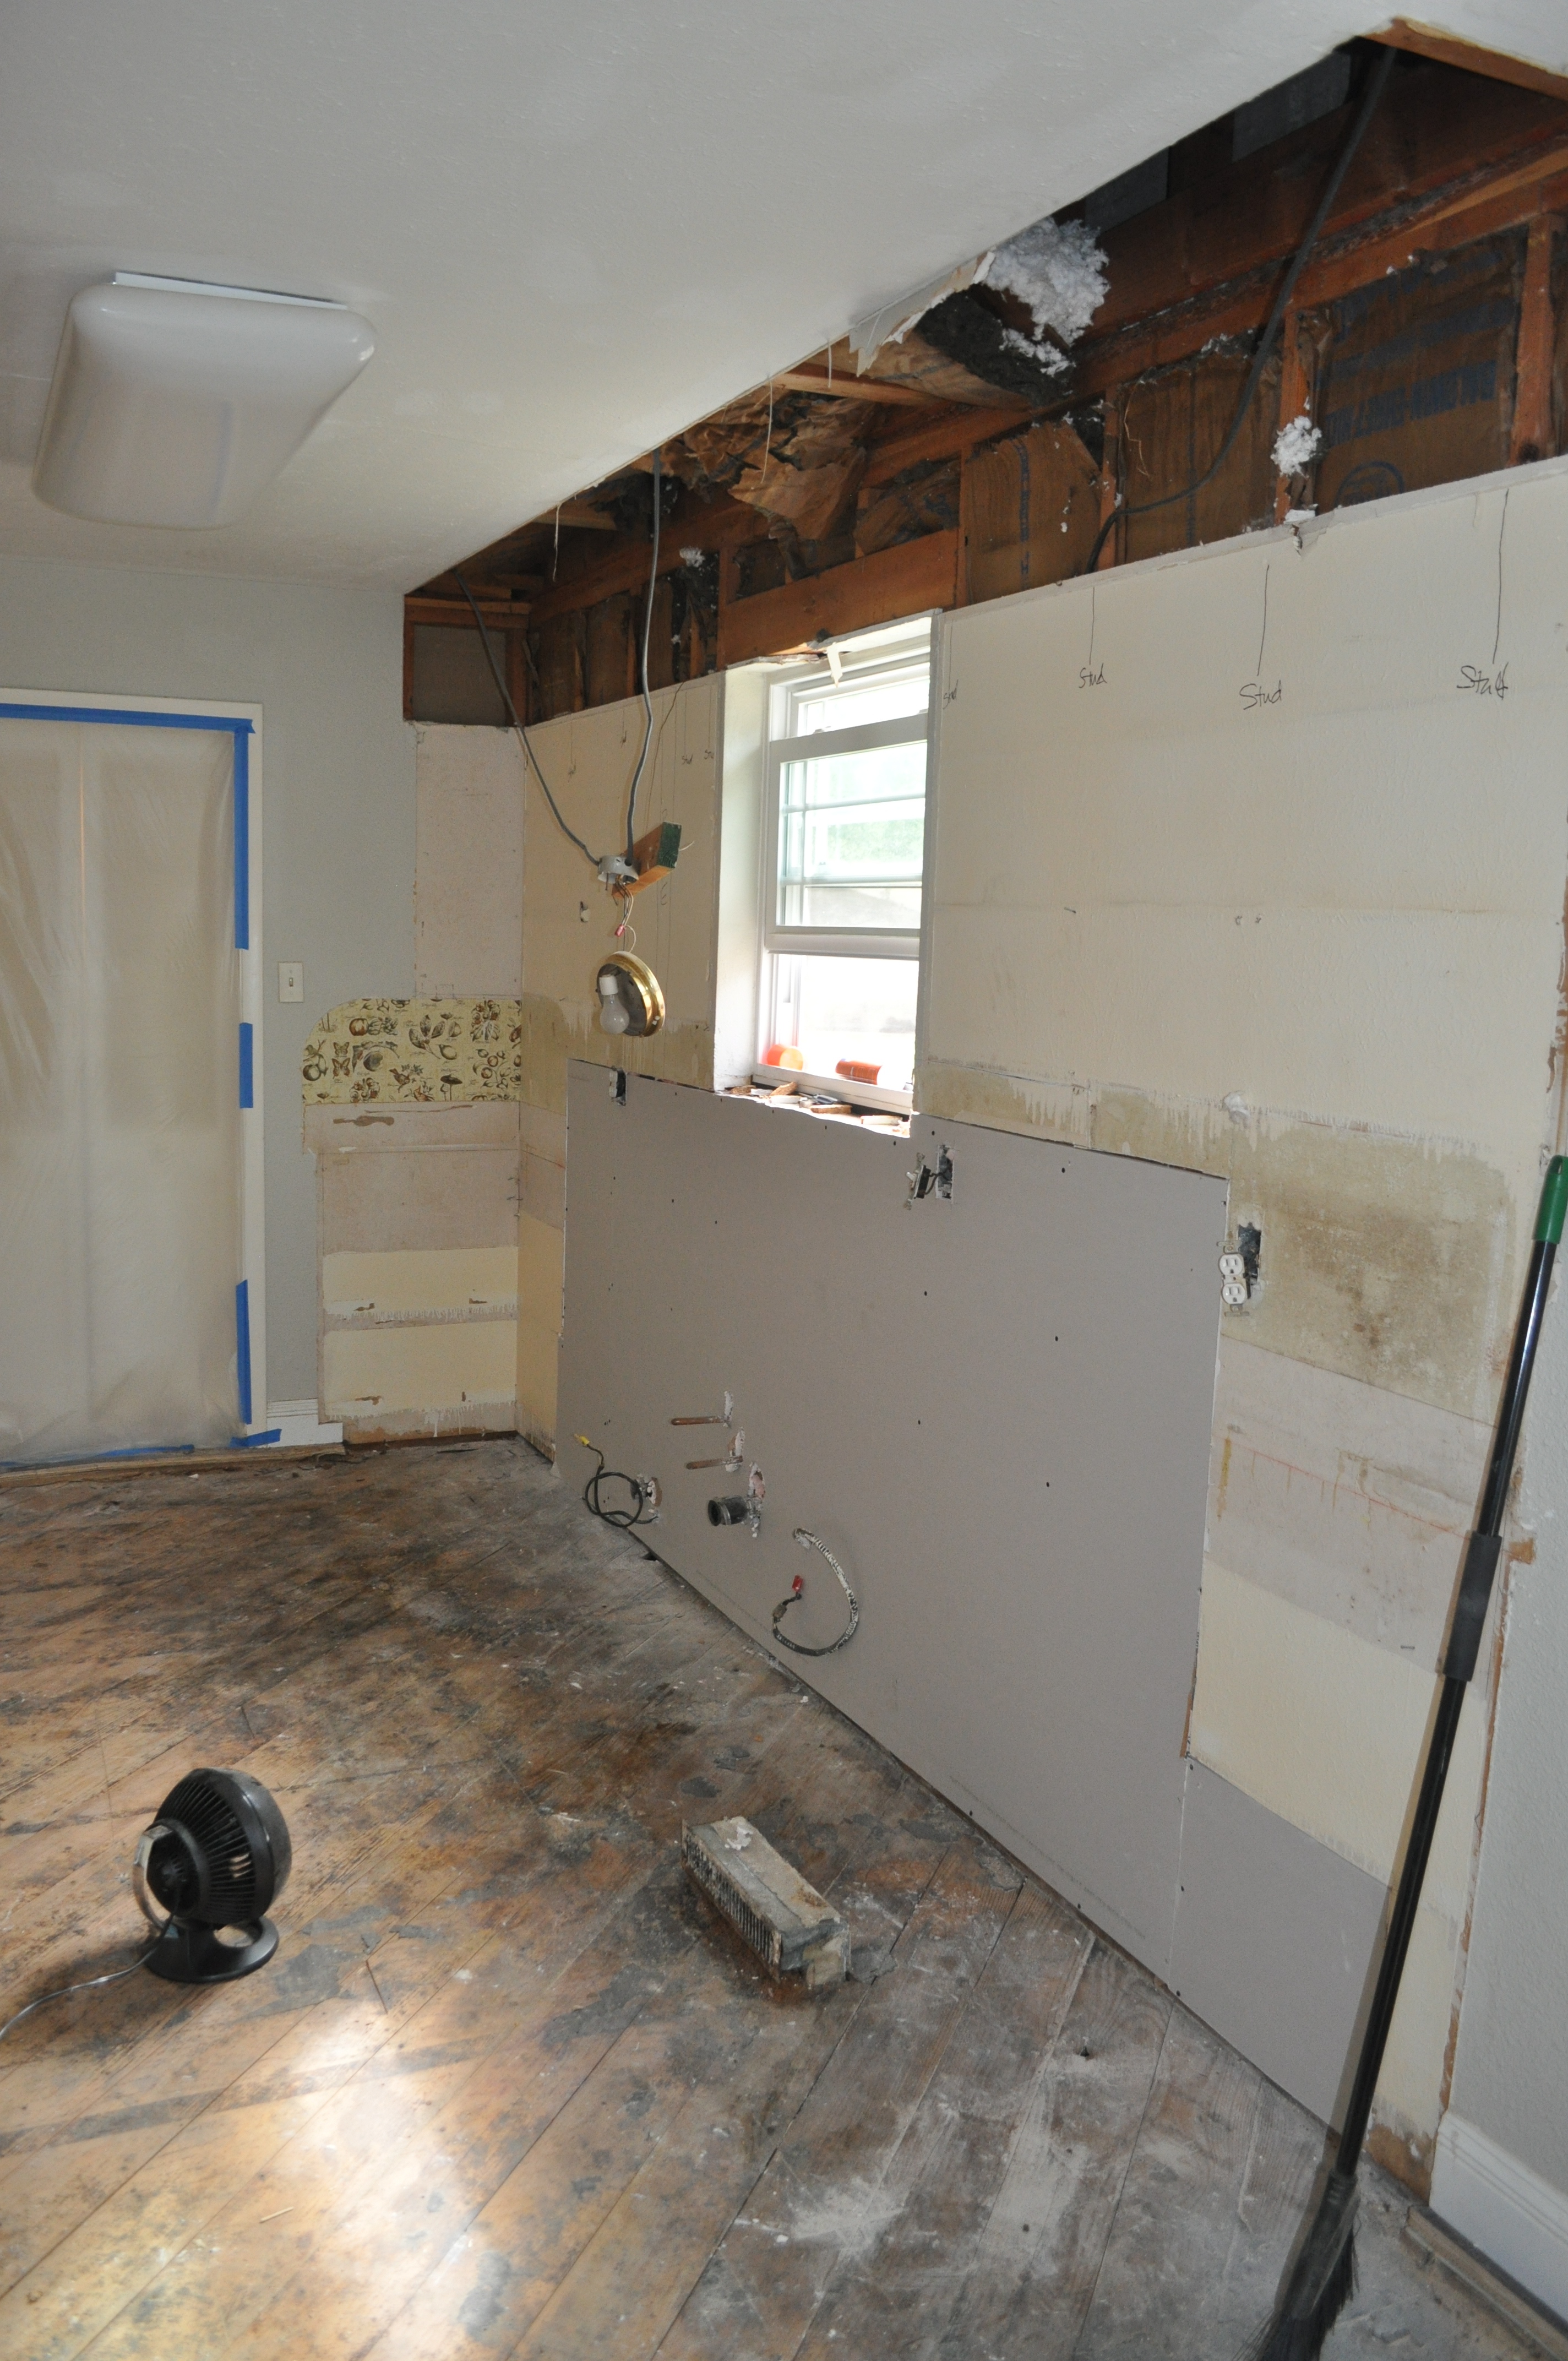
 I’m just loving our choices, and it’s coming together beautifully. But yes, we need to paint that door and trim to match the space – we know!! It’s on the docket for this weekend! Here’s a before/progress pic, too!

I cannot wait for the countertops and backsplash to be here! I’ll share all that goodness next!! They are so gorgeous; I would sleep with the sample, if the hubs didn’t think I was crazy!
Thanks for reading, friends! Happy Week!