dining room

Full DiningOur dining room feels a little like a real dining room since the addition of chairs thoughout theses last weeks. I know I talked about a couple of different options in this post and wanted you to see the completed collection.

Side Dining

We matched our bench with the table and went a little different with the high-back West Elm chair in elephant leather. I love them and think they are rather comfortable, too. FYI, if you want anything from West Elm, Crate & Barrel, Pottery Barn, I suggest getting on their email list. They have weekly specials and if you’re patient, your item will come up 15-30% off. I never pay sticker price for these big ticket items.

Table Top 1On the other side of the bench, we found these two Village Grigio side chairs at Crate & Barrel in a clearance section of their floor models. We bought them both with cushions for cheaper than we could buy one chair without a cushion new! I was in. It matched the elephant leather of the West Elm chairs, and if I didn’t like them, I wasn’t all in with a high price tag! Score. Luckily, they worked perfectly.

Table Top 2

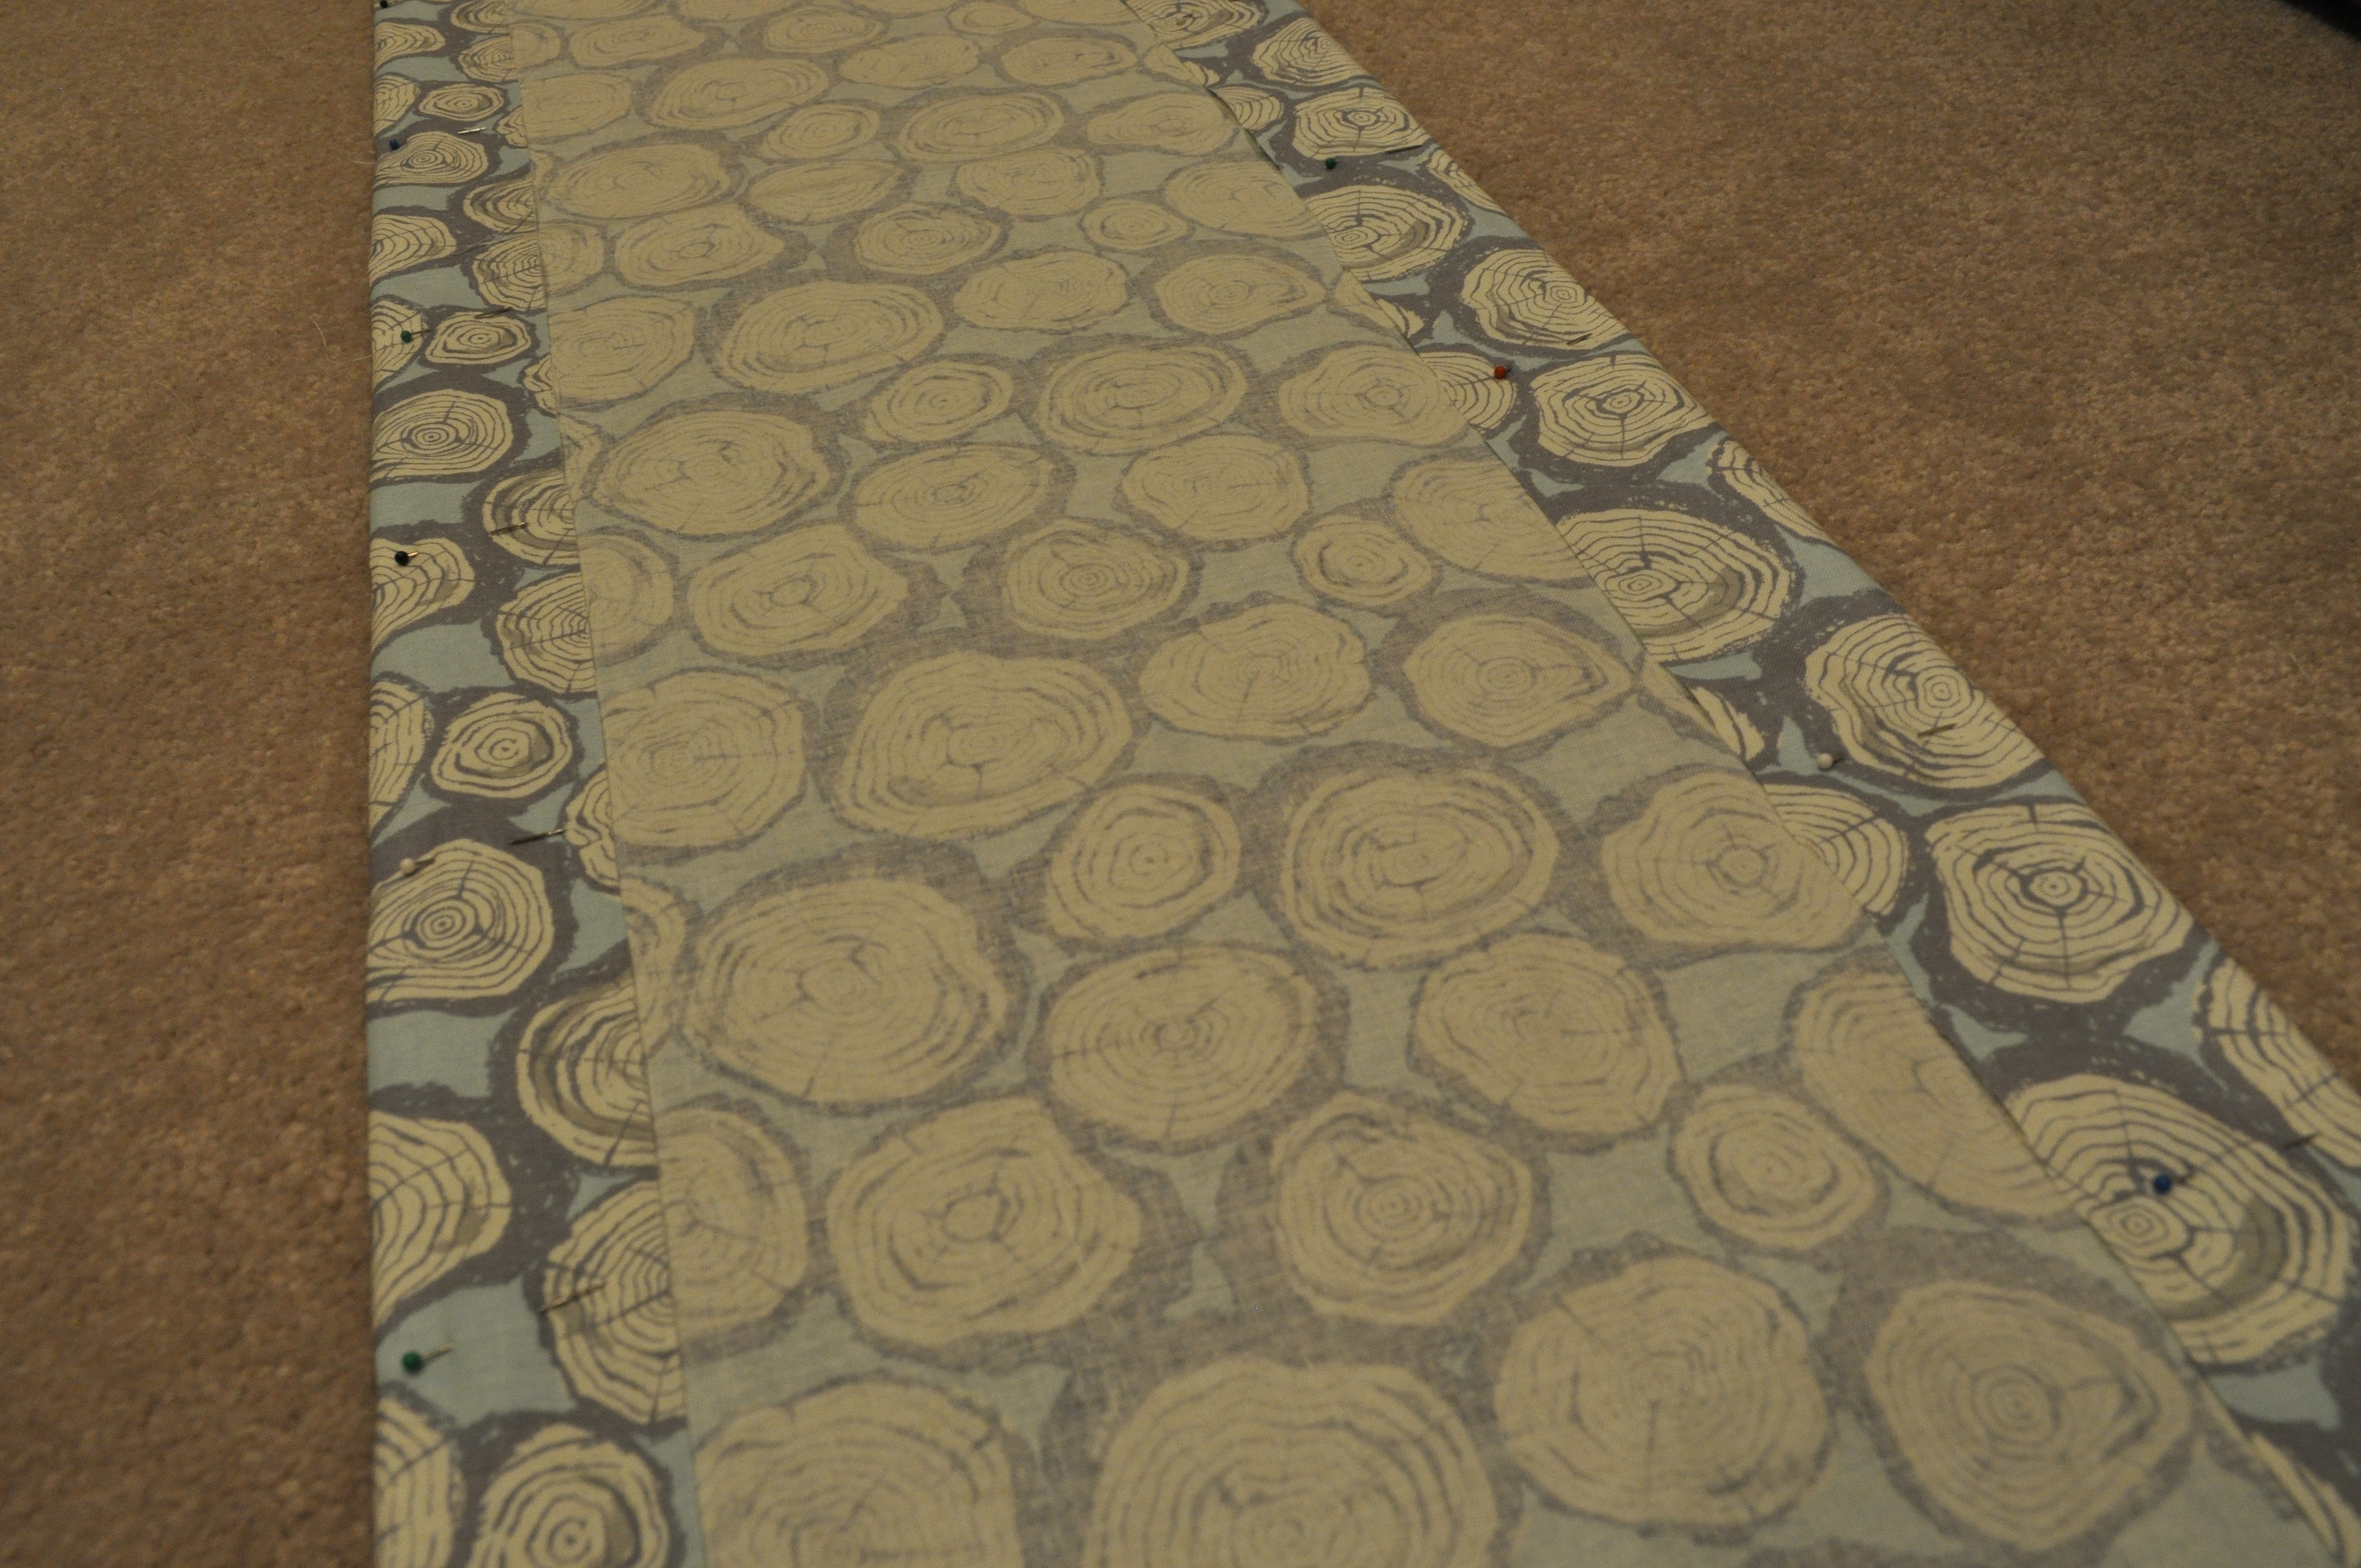
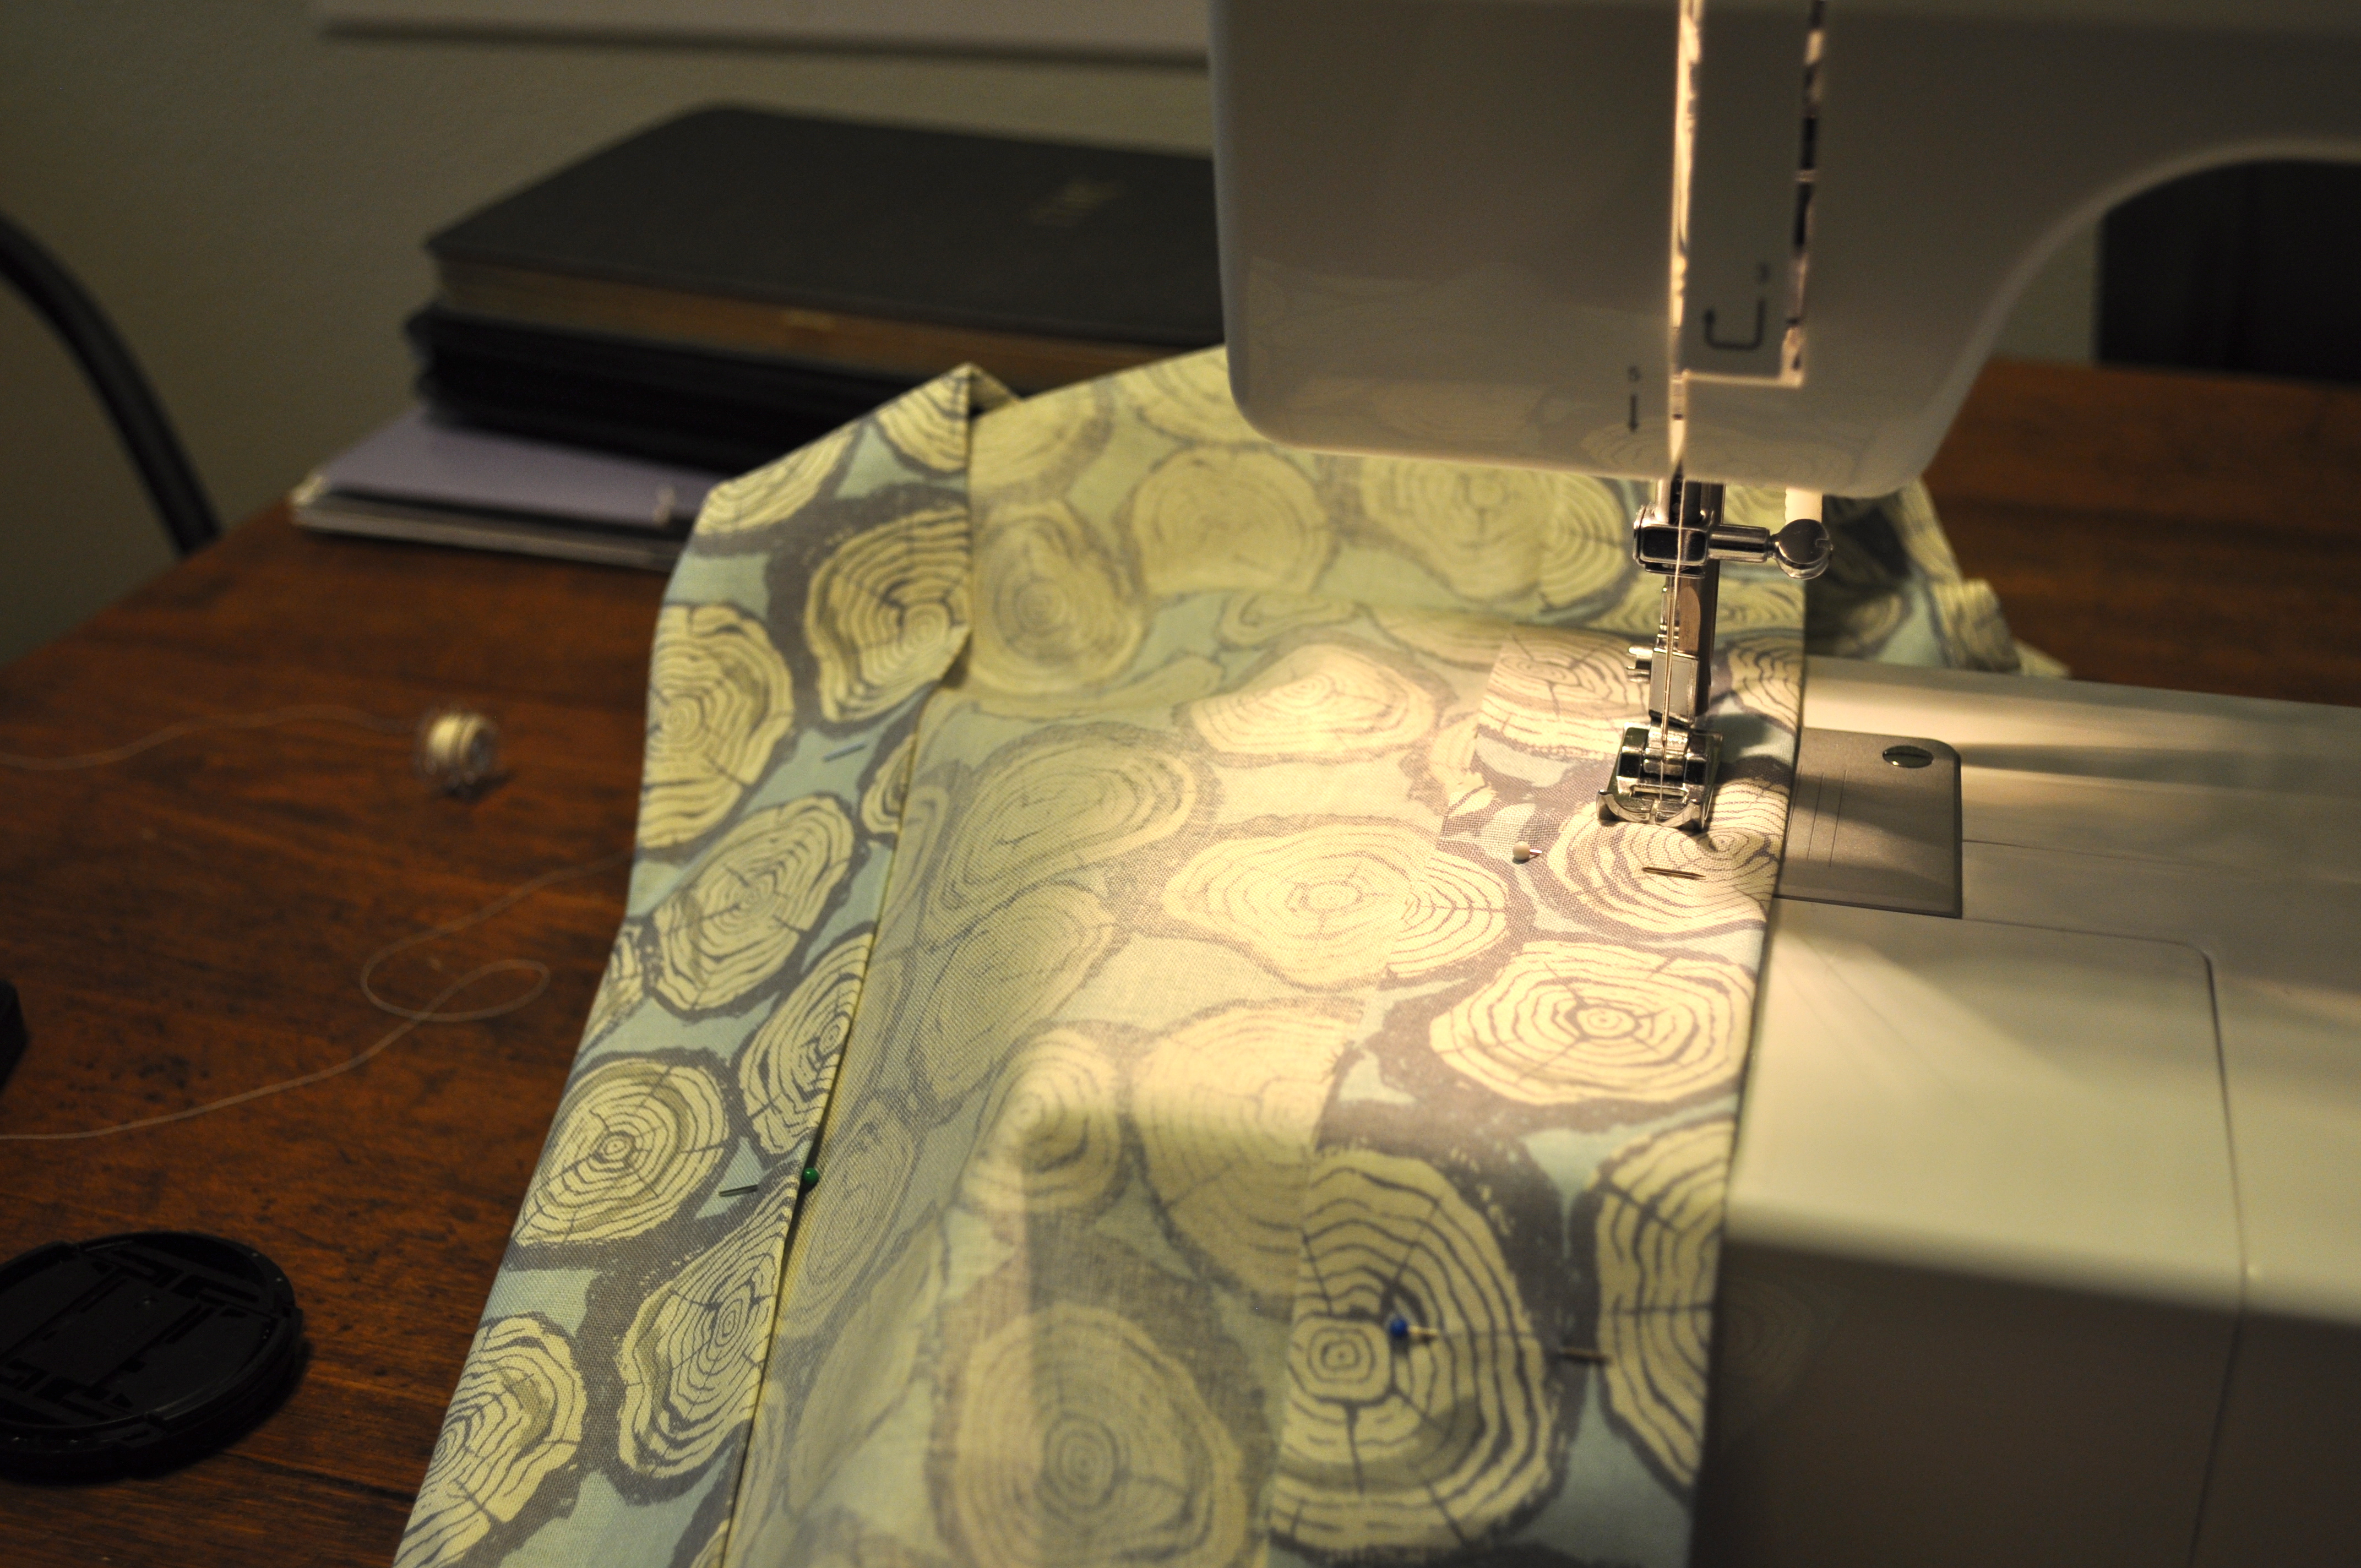
The center piece is a collection of old and new things. My white everyday side plates, a french wine bottle from The Whimsey Shoppe, the birds were from an estate sale (my favorite past time), and the table runner is from Pottery Barn which I purchased for $9.00. What can I say, I like love a deal! One of my girlfriends actually got this same table runner as a bridal shower gift the other weekend, and I was in love with it! It’s subtle but works well in the space!

Bench Dining

I think the whole space looks wonderful, and I can’t wait for my father-in-law to come down and help the hubs put a little light on my beautiful subject! I’ll keep you posted!

windows!!

Cover WindowsWe did one of the biggest impact additions to our house to-date! I have to thank my husband for pushing this decision. I wasn’t convinced we needed them. Windows that is. I thought we could live with towels around our windows, the inability to open most of them, and a huge crack in the nursery window. Yes, I’m serious! We have plantation shutters in most of them that doesn’t show a thing, so who cares if you can’t open them? Plus, windows can get pretty, pretty pricey.

With that, we had a home consultation with a couple of companies, talked to neighbors, friends, and family to hear their input and finally pulled the trigger. I was still hesitant with this decision, but we moved forward.

Construction

Because we aren’t sure if we’re going to live in this house forever, we didn’t go with the highest-of-high end windows but also didn’t pick the dirt cheap ones either. We went with Home Depot’s higher end brand Simonton windows which have a life-time warranty. Even if our baby boy’s aim isn’t as good as his father’s or papa’s, we won’t have to pay for a broken window. Pretty nice.

First window in!

Guest Interior Window

We also decided to put panels in the windows that matched our backdoor. I was a complete wreck about this decision, because it added to the cost ($100+/each), and I couldn’t uninstall the windows if I didn’t like them. But I knew any panels were better than none, and it add to a classic rich look that people like, and I love. Plus, it’s a nod to my love for Frank Lloyd Wright and his prairie style.

2nd Window

Interior look

I don’t know if it shows up on these photo (mostly from my phone) but trust me they look beautiful in person. I love being able to turn the thermostat down and open up the whole home on these wonderful spring nights. I thank my husband for pushing this desicion.

Before and After Windows

They are beautiful, and we could not be more pleased with the service and look of our windows!

belly project

Hi Friends! I’m back from my own spring break week of R&R goodness but don’t think I haven’t been thinking about my blog! I’m excited to share with you all the projects I’ve been working on around the house and share my newest milestone of making it to Week 21 in my pregnancy! That’s more than half way! Yay!
6 weeks
When people ask how I’m doing or how my day was, I always respond… Well, besides growing a baby (or making life), I…. It’s fun, makes people laugh, and it’s pretty dang cool to be a woman! Here’s the first half of my belly photos. I’m loving this process. Yes, at times I asked myself is this “baby” growth or my new found love of ice cream and jelly beans; either way I don’t care. All I want is a healthy baby, and I can take care of the details after the birth!
13 weeks
I found it kind of tedious to put on this shirt (which doesn’t do my bump justice), and make the hubs take pictures, so I started snapping pictures in my own gear with or without the hubs! In the picture below, he offered but I said I got it! He he.

15 weeks

15 weeks

17 weeks

17 weeks

19 weeks19 weeks

20 weeks

20 weeks

21 weeks

21 weeks

So, there you have it! My first 21 weeks have been a breeze. A big Thank You to the women in my family before me for the good pregnancy genetics. Here’s to 19 or 20 more weeks! I already have my prediction on the due date! Ha ha.

costa rican

C.R. Cover

This Costa Rican meal was first brought to my attention by a North Dakotan. My wonderful sister-in-law (and brother, too) invited us to share a week long vacation with them in Costa Rica. They have been enjoying this vacation spot for many years and wanted to share a little bit of heaven with us. It was a wonderful experience, and I long to visit again and explore more.

Some of the things that stuck with me during our trip were the sunsets, monkeys and baby turtles, and a classic Costa Rican dish of beans, rice and eggs called gallo pinto! Yum!

Costa Rican Sunset

Monkeys

gallo pinto

source

Making this meal stateside could not be easier. I use a package Vigo black beans and rice and six eggs. For the sauce (Lizano Costa Rican goodness) I bought on amazon, which is the same sauce that can be found in the little coastal town where we stayed. It’s a huge bottle and will last a long time!!Lizano & Vigo

Recipe

Ingredients

  • Vigo black bean and rice
  • 6 egg
  • 1/4 milk
  • Lizano salsa

Cook rice and beans as directed. Whisk together eggs and milk in small bowl. Place eggs in pan on medium heat. We cook our eggs very lowly so that they are cooked through and are fluffy but a little runny.

Place rice, beans, and eggs on plate and drizzle with Costa Rican goodness, Lizano! This is a wonderful breakfast but I enjoy it anytime of the day! Enjoy!

C.R. Final

crib skirt

crib skirt cover

Our crib has this weird in-between space while the crib is set high for an infant; I felt it needed a more finished look with a crib skirt. Standard crib skirts were too long for this crib, so I had to find an alternative approach. Luckily, my favorite blogger also went with this crib for their wee-one here, so I followed some of their recommendations for crib skirting and mixed a few in of my own.

I started by cutting the panels about three inches longer than the actual width I needed. So, if the space was 10,” I added 3″ to the measurement and cut the panels 13″ long. I did this for the length as well.

crib skirt - panels

After cutting the panels, I pinned about a 1 1/2″ hem on each side.

crib skirt pinning hemThen it was off to the sewing machine to sew all the edges into place. Seriously super easy!

crib skirt sewing hem

After sewing a panel, I then used velcro to adhere the crib skirt to the crib. If I would do this again, I would buy velcro for both fabric and metal. The velcro instructions stated to use an iron on each piece for 90 seconds. It worked really well, though it was awkward trying to use the iron on the crib metal.

crib skirt velcro

Finally, it was ready for assembly. Match up the velcro and you are done!

crib skirt velcro to crib

crib skirt - one panel down

I repeated this process two more times for the side panels, and it worked really well! Obviously, I know I still need to get my mattress in there! Hopefully by the time we get the dresser and the glider, I’ll also have the mattress.

crib skirt final

crib skirt detail

In case you’re curious about the fabric, it’s from Sarah Watt’s collection. I fell in love with her collection featuring a wildlife-looking motif, and love the look of the faux wood tree rings. Others in her collection are birch trees with deer, fox, pine, and bears! So cute!

Sarah Watts

Otherwise, I hope this helps anyone else having the same issue as I had with the weird in-between space. Honestly, it was way more fun picking my own fabric than choosing a crib skirt out of a catalog! I suggest it to everyone!

no bake fudge cookies

Cover NBC

My elementary school friend Casey and I would make these, and half of them would never make their debut into cookie form. We would make a batch, eat half from the pan, and then go swimming in her pool all afternoon. Then eat the rest after. Seriously. The good old days of thinking nothing of eating a whole batch of cookies is long gone, but every time I come across this recipe, I think of her and the great times we had rollerblading, playing in her creek, and swimming. We were active kids and had great adventures.

RecipeIngredients

Ingredients

  • 1 3/4 cup sugar
  • 1/2 milk
  • 1/3 cup cocoa
  • 1/2 cup butter
  • 1/3 cup peanut butter
  • 1 teaspoon vanilla
  • 3 cup quick oats

Combine sugar, milk, cocoa and butter into saucepan and bring to a boil..

boiling NBC

Remove from heat. Cool 1 minute. Then stir in remaining ingredients.

MIxture NBC

Drop on wax or parchment paper with a teaspoon or tablespoon.

wax paper NBC

Let set and cool until they peel off the wax paper easily. This recipe makes about 25-30 cookies. I’ll admit it: I ate three before they were cool. Thanks Casey for the memories.

Final NBC

crib

The hubs and I have done many projects around our house to help improve the aesthetics and versatility of the spaces we cohabit. Never before has a project been more momentous than this one. Well, maybe our windows (pictures coming soon) or the visions I have of a new kitchen but… this one is up there. Making space for our kid! What?

Crib

This weekend, an important piece of furniture was assembled in our guest room, now called the nursery. My dad was generous enough to spoil us (and his future grandson or granddaughter) with buying the crib and mattress for our little bean. I wanted a modern looking crib with clean lines and storage for blankets and crib sheets. I also wanted it to be semi-affordable as I know the mattress and other kid stuff can get pretty pricey. We decided on the Parklane 3-in-1 crib for $300.00. Holla!

oeuf crib

Our second choice was the Oeuf crib, which also had the wood/white modern look we were wanting but with no storage and a hefty price tag of $1000.00, I was much happier with our choice. We then plan to purchase the pebble pure mattress which boasts a price tag even higher than the crib! I told my dad I would pay for half of the mattress. The pebble top is also the mattress pad which can be taken off and washed, too.

Pebble Mattress

The assembly of the crib was a smooth one. Boston (and Otis, not pictured) were happy participants in the process. They might have thought we were assembling their new crate. Ha. We only made two minor mistakes while assembling!

Building Crib 1

Building Crib 2

We are really pleased with our selection, and it makes it that much more real when you have a crib set up right across the hall from you! I peek in on it daily. I know this momentous occasion feels small in it’s time, but I’m sure I’ll be reading this exact post when he or she is moving out of our home into his/her college dorm or first apartment. I’ll probably be balling, too!

Oh, and don’t worry the dog crate and other things will be out of the room before the baby gets here.

Crib

four score…

Framed

Four score and seven years ago… actually, four and a half years ago the hubs and I tied the knot. But it wasn’t until a couple of days ago that I actually got our wedding photo framed. Don’t get me wrong, it’s been planned to be framed for years. I even incorporated framing it in the arrangement being hung up in our living room.

Arrangment

It’s the top one, still in plastic. After weeks of seeing it up on the wall with just plastic, I decided to put a faux-frame (I had sitting around the house) around the plastic. It cut off some of the wedding party on each end but it looked better than just the plastic.

Gold frame

Finally, one evening I was reading in the living room and looked up at it. It needed a real frame. I was a big girl, with a big girl job; I could afford to frame my lone wedding party photo! I snatched both the frame and the photo off the wall, and the next day I was in a local framing store weighing all my options.

At first I thought I wanted gold, like the frame I had, but the frame master at the store said to look at silvers options too, and I was convinced that it looked the best. It took me four-and-a-half-years to frame the photo and about ten minutes to actually pick a frame and glass. I was amazed. Why hadn’t I done this years ago!?! Oh, right, framing can get expensive! Ha. Two weeks later I was able to pick it up, and I headed straight home to replace the empty spot with a correctly framed photo.

Final Frame

I am in love with my decision and so happy to see all my closest friends and family all framed up! This wall is a nice homage to some of the special travel spots the hubs and I have loved! I love looking at these when I’m sitting in our living room or walking through the front door. I hope our visitors like it, too!

Final Framing

dill pickle chip crusted salmon

cover

A few weeks ago, I Facebooked about my love for Dill Pickle Chips north of the Mason-Dixon Line, and guess what appeared at my door step! Yep, a whole lot of Dill Pickle chip goodness!
Old Dutch Pickle Chips

Our Aunt Nancy read my facebook status and made a trip to her local store to pick them up and ship them down to Texas! It was one of those amazing surprises! If that wasn’t enough, she also added in a couple craft items that she created! We already have them displayed and will love them for years to come!

Tile

Scrabble

I brought the Dill Pickle Chips to work to share (only one bag) with my co-workers. They loved them as much as I did and mentioned they tasted much like salt and vinegar chips with dill. That got me thinking about a recipe I would make all too often with my roommate Jessica (well, she lived above me but she might as well have been my roommate) in PA school. She wasn’t a fan of fish, and this was the first dish I could get her to try to move into the world of eating fish. It’s a recipe modified from Young & Hungry by Dave Lieberman.

Recipe

Ingredients

  • 16 oz salmon
  • salt
  • freshly ground black pepper
  • 1/4 bag of kettle-cooked potato chips (or dill pickle chips)
  • Zest of 1/2 lime
  • 1/8 cup chopped fresh dill (I didn’t use this time, my chips were already dilled!)
  • Olive oil

Preheat the oven to 400°F. Line a baking sheet with aluminum foil. Lay the salmon, skin side down, in the center of the baking sheet. Season it lightly with salt and pepper.

Crush the potato chips, lime zest, and dill together in a bowl until the chips resemble coarse crumbs. Mix in 2 tablespoons of olive oil until incorporated.

chip mixture

Coat the salmon with a thin, even layer of potato chip crumbs. Pat them on the fish gently so they stay put.

chipped up salmon

Bake for about 20-25 minutes, or until the chip coating is nicely browned.

oven crisp

This recipe serves 4 -5 people. If it’s just the hubs and I eating, I usually start with a smaller piece of fish. Enjoy!

final