independent dependent

20120628-203537.jpg

I read an article the other day that tugged on my heart strings, and I knew I needed to express myself. What better way than my blog. In July’s Issue of Real Simple it tells about a mothers struggle for her own independence after 14 years of marriage and two children.

Though I’m only at three-and-a-half years of my own marriage, I’m certain that my struggles in my marriage and for my own independence are different than the writers, but I felt her words resonate in my own life. I grew up independently. I had caring and loving parents that let me take my own journey. I lived with friends and on my own, traveled to Africa, and West Virginia on my own (trust me, they’re more similar than you would think), and even went to the movies and snowboarded alone. I learned carpentry from my father who never believed that women were less capable than a man; he made me feel like I could accomplish anything, even wire my own playhouse. Which I did. Successfully. I took basic car care in high school and had to coach a boyfriend how to change a tire in college because he didn’t want to sit by while I changed the tire. With all this, I would watch my own mother ride contently in the passenger seat as we traveled; she would wait to have my dad fix things around the house and help her navigate through airports. I secretly hoped I wasn’t that dependent. I wanted the control. I wanted to be self sufficient. And honestly, I thought women in that role would be considered weak. I was not weak.

Now with my own marriage, I find myself letting my husband take the wheel, navigate new cities, even ask him questions when I know the answer. He installs the light fixtures or hangs picture, even though I’ve done all of those things by myself in the past. I think this struggle of independence is a struggle a lot of women face and it made me happy to read this article. I make some of it up in having my own career, traveling to see friends on my own and knowing where our money goes, but I think the author makes a great point. At the end of the day, you now decided to be part of a team. Now, you get to choose if you want to ride along or take the wheel. Sometimes, it’s nice to have your suitcase carried up the stairs or have a picture hung while you run errands. My mom made a choice. I’ll make that choice, too. As long as my husband realizes I can still do these things, that I still have those skills, it’s nice to just sit back while he’s cooking and pour us some wine.

Happy weekend friends.

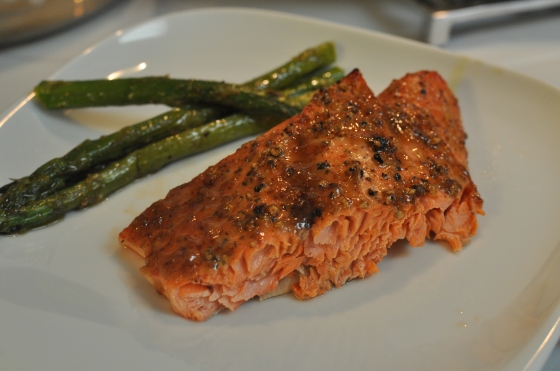
brown sugar glazed salmon

I’m about to blow your mind in the salmon world! Honestly, this is what we compare all other salmon recipes to. Seriously. I’ll make a new salmon recipe and ask the husband:

Do you like it?!?

If he responds “Yes, it’s really good.” I’ll ask a follow-up question.

Is it as good as the brown sugar salmon?

And inevitably he will say, “No, what do you think?” and I always reply:

“Yep, I agree… Nothing, compares to that brown sugar salmon!”

So, here it is, the brown sugar salmon amazing goodness. One of my dear friends found it and knew I would love it! It’s been a staple in our home for a couple of years now. My love for all things salmon is a serious one. Maybe I was a bear in a my past life?

Recipe

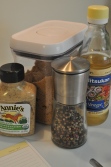
  • 1 lb fresh salmon (serving size: 4)
  • 1/4 tsp pepper
  • 1/4 tsp salt
  • 3 Tbsp brown sugar
  • 4 tsp Dijon mustard
  • 1 tsp rice vinegar
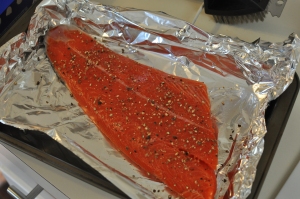
Start by salt & peppering the fish in a foil-lined baking dish.

Bake at 425 degrees for 10 minutes.

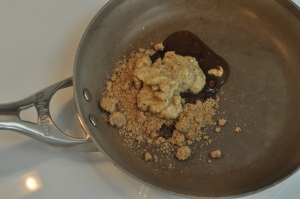
While baking fish, add remaining ingredients (brown sugar, mustard, and rice vinegar) together and bring to a boil on the stove top.

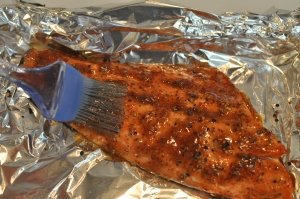
Brush glaze onto fish.

Then broil for 1-2 minutes, until done/flakey!

This is our favorite salmon recipe! Super easy, fast, and a quick clean up, too! Enjoy!

If you’re doing Weight Watchers, I found out it’s only 6 point plus points! Healthy and delicious, it can be done!

closet cubby

This little cubby has been bothering me for a while. It’s a built-in I have in my closet. A beautiful space that hasn’t been used well at all. It’s been a visible junk/catch-all and everytime I walk into my closet, I cringe. I want to spend some time reinventing the space and making it more functional and beautiful, but I don’t want to spend too much money on this space especially considering someday we’re going to renovate the whole closet and bathroom space.
I’ve been pinning different ideas on Pinterest and found this inspiration. I also wanted a place for a cork-board. I could have a single place for my inspirations. I tend to cut out multiple magazine clippings that get scattered in various folders and notebooks. So having a place to put a few of them would be fun, too!
I wanted a place for my jewelry, design, and clothing inspiration, so I set out to make a cork-board. I got a 50% off coupon at Michael’s this weekend and used it on the cork-board. At JoAnn’s fabrics (another coupon in hand), I found clearance fabric, a bust, and hook-and-eyes for the frame of necklaces. The other supplies: adhesive spray, wallpaper, duct tape, and a frame I already had around the house.
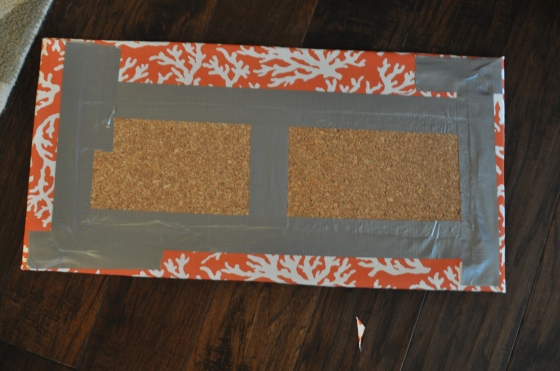
I used duct tape to attach two squares of cork-board together and applied adhesive spray to attach the fabric to cork-board.
I used duct tape to attach the fabric to the back of the cork-board.
Easy, right?!
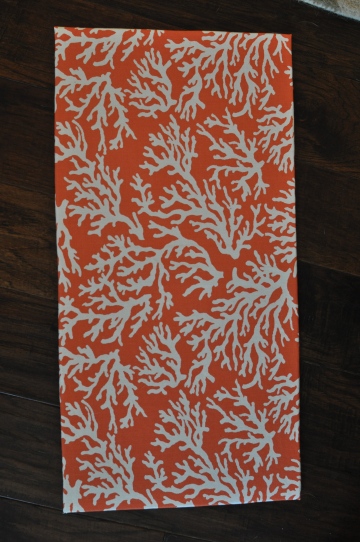
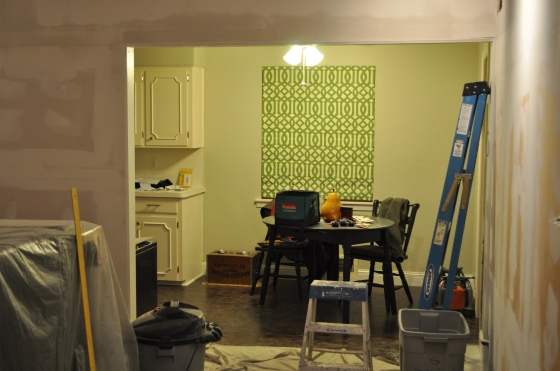
I’m still obsessed with the trellis pattern now living in my dry bar (as wallpaper) and kitchen (as roman shades). Seriously, I could have this pattern in every room, and it wouldn’t get old. I love it! I considered even buying this print as pillows in my bedroom or living room… obsessed! So, I decided to use some of the leftover wallpaper for my closet frame. First, I cut the cork-board to the size of the frame.
I used adhesive tape and duct tape just as I did with the fabric board.
Complete!
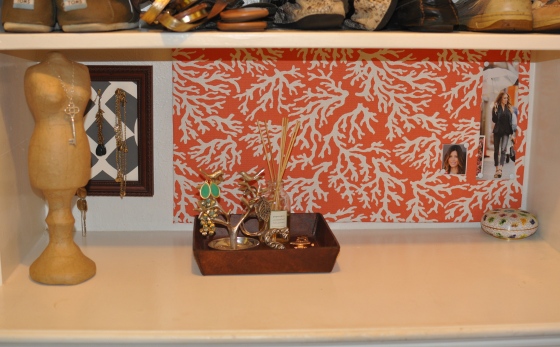
Then, I assembled my collection on the wall! I just used 4 small nails for the cork-board and applied a picture frame hanger to the back of the frame to hang.
And just one close-up for fun!
I am absolutely loving this space.  A simple and cheap alternative to bring some life back into this closet space… why not make your closet fun!
Posted in DIY

wisconsin summer

Sorry this is late! I’ve been trying to get a post out Monday, Wednesday, and Friday, but sometimes that just doesn’t happen.

I headed home for a little R&R last weekend and to help my parents deal with some health concerns. My brother was also able to come home and he brought my fabulous niece and nephew (Ben & Ellie) and their younger brother, Thomas.

It was a much needed weekend at home.  We ate too much, did too little, and just had a fabulous time. Here’s a couple photos from the visit.

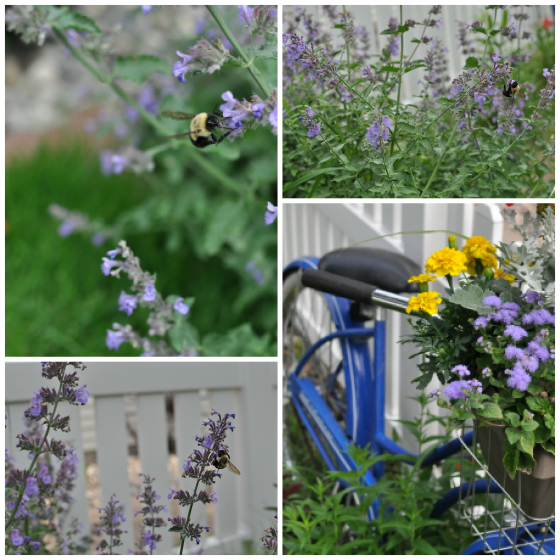
Saturday morning, I walked outside to find a couple bees pollenating the flowers in our front yard. Ahh… bees and fresh air!

And then there were the kiddos! I definitely want to work on my skills of photographing moving subjects!  Wow, it’s difficult and I have a new found respect for professional photographers who work with children.

I hope everyone has a fabulous weekend!!

cucumber water

Yes, I’m writing a post about water. But not just any water, cucumber water! We discovered this amazing combination in Mexico and brought it home to enjoy all year round. It’s a great alternative if you get sick of just drinking water but don’t want to add artificial flavoring.

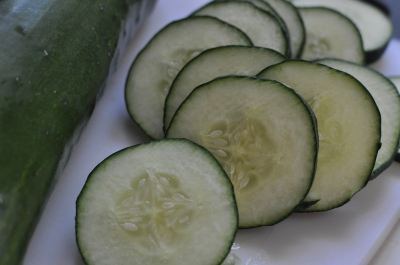
Okay get ready… this is what you do. Cut up cucumbers.

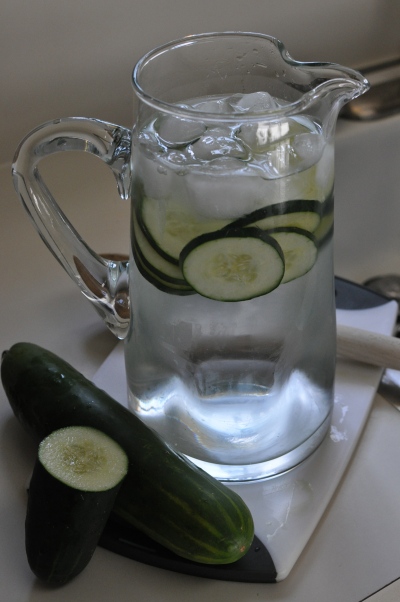
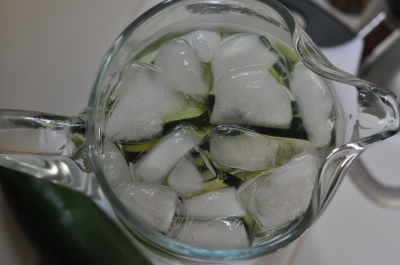
Add cucumbers to a pitcher of ice water. Let sit for a couple hours and you’re done!

Drink your water! 8 glasses a day, any way you like it… straight, lemon, lime, orange, or Cucumber!

old bones

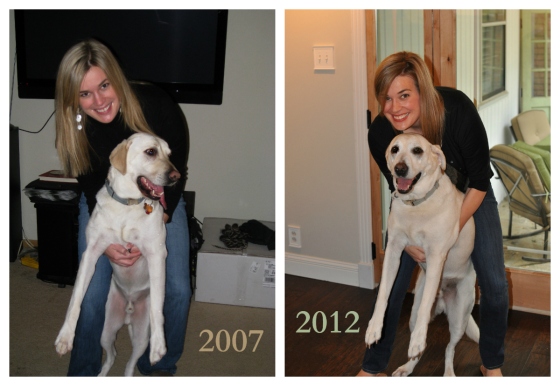
This handsome man turned the Big 8-years-old this past Wednesday! Actually, it’s his “made-up” birthday. I found Boston in the middle of a highway, tired and smelling like manure in April of 2005. At that time, the vet examining him said he was around one year old. I put up fliers, called the police in the area but (to my luck) no one claimed this yellow lab, whom I named Boston. His nickname “Bones” came from my father. I walked him into my parents home after I found him, with a fused broken back leg and ribs showing; his nickname stuck. Luckily, my parents are compassionate people and let me keep him. He was a wild “puppy”, which played a large role in my decision to take up running. Thank you Boston!

Since our chance meeting, he has been by my side through good times and bad, through a masters degree, five state moves, and so much more. It’s been a hard life!!

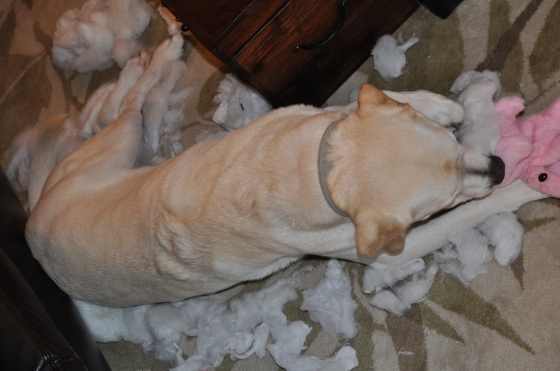
This birthday was pretty low-key.  We got him a “durable” toy that made it longer than most, a bone, and a treat that helps with arthritis… It pains me to think he’s the equivalent of 56-years-old in human years.

I’m so fortunate this crazy man found his way into my life.  Happy Birthday Boston; you’ve helped me more than you know.

grilled salmon & avocado cream sauce

I was on a high school friend’s blog, The Food Driven Life, the other day and had to try another one of her recipes. I love salmon, served anyway I can get it. This recipe looked like a great summer treat. The warm salmon paired with the cool avocado sauce reminds me of putting jeans over my tan skin, during those summer nights growing up in Wisconsin. Weird analogy, probably. Anywho, it’s a fabulous, easy, quick meal, perfect for the summer, and healthy to boot!

Recipe

  • 2 salmon fillets or 2/3 pound of salmon
  • 1/2 avocado
  • 2 Tbsp light sour cream
  • 2 Tbsp nonfat Greek yogurt
  • 1 Tbsp light mayo (optional)
  • 2-3 Tbsp lemon juice
  • 2-3 Tbsp chopped fresh dill
  • 1 Tbsp water (optional)

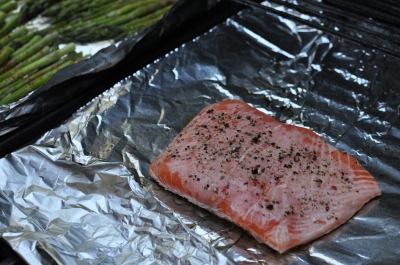
Prepare the salmon by drizzling 1 Tbsp of lemon juice over the salmon and a sprinkle of salt and pepper to your liking. Heat grill to low-medium – you want to cook it slow. Grill the salmon 7 minutes on each side or until orangy-pinkish.

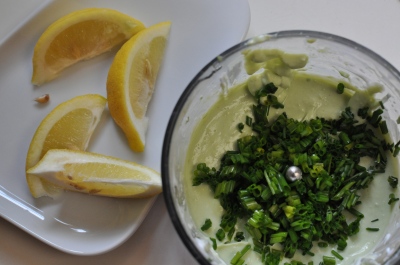
In a food processor, combine the avocado, sour cream, yogurt, mayo and lemon juice. Mix until creamy.

Stir in dill and optional water.

I omitted the mayo in mine but added the water for perfect consistency.

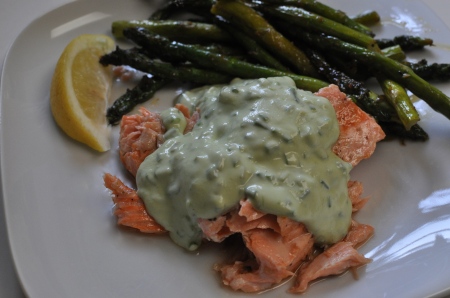
Spoon cream sauce over salmon and serve.

This is a fun summer treat which I will be sure to bring out throughout the summer months! Enjoy!

dry bar & wallpaper

I’ve been rather excited for this project and reveal! But oh so nervous to make a decision on what to do with the space and to-do-it-myself! I’ve been conjuring up ideas for this space for a while and procrastinated on actually putting it together even longer. There were so many times I wanted to call up an expert to put up the wallpaper, but I didn’t … and I’m happy I didn’t!

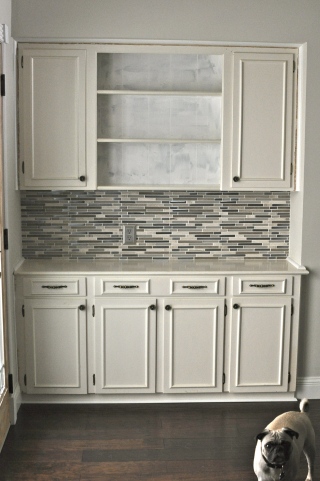
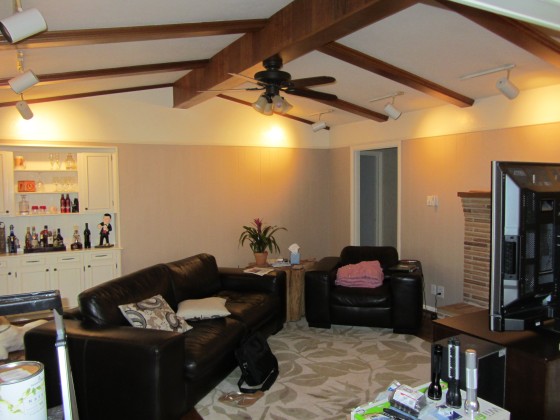
One of the reasons we bought our house was the love for the built-ins. In our living room, we are reinventing one of the built-ins as a dry bar.
Here’s the original, before we moved in:
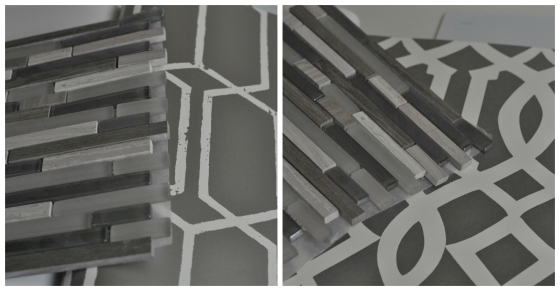
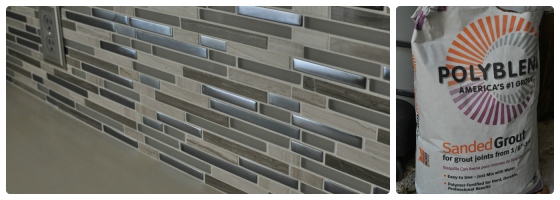
We first wanted to add a backsplash to the space. We played with a couple ideas of putting the backsplash throughout the space or just at the base. We found a great backsplash with a lot of different grays and stainless steel and decided we would do the base only.  This seemed like the best option for the space and for what we were trying to accomplish. Then I was on a mission to find a fun pattern or paint color for the shelves. I first tried Benjamin Moore Dragonfly AF-510 but it was hideous.  So hideous I didn’t even take a picture.
For the backsplash, we bought the tile from Floor & Decor and the grout in Snow White from Home Depot. We decided to give the task to the pros and paid the door installers $75.00 to install the backsplash. Worth. Every. Penny.
Once that was done, it was my turn. I ordered the wallpaper and had to wait about a month for it to come in! Crazy! But it gave me more time to stress out (a little bit more) about what the heck I was thinking when I decided to DIY the wallpaper.
This was the weekend though: Wallpaper 101!
Tools I used:
  • Scissors
  • Soft wall brush
  • Flat tool (to smooth out the wallpaper)
  • Tape measure and ruler
  • Level
  • Pencil
  • Premixed, undiluted, clear vinyl adhesive paper
  • Utility knife
I referenced the Schumacher Screenprinted Wall Paper Instructions.
Start by preparing the surface for wallpaper. There was paneling within the shelves so I filled it with wood filler, sanded the area, and painted the surface with primer. I washed off the surface with soap and water before applying the wallpaper.
Once the surface is prepped, cut the wallpaper to size. Leave about 2″ on each end to adjust for trimming. I left a little less just because I wanted the pattern to continue from each shelf, seamlessly. I put a “T” for top on the back of each piece and indicated which shelf I wanted each piece to be placed. (i.e. TA, for Top Shelf Piece) I recommend marking the wallpaper; it was such a time and sanity saver! Take the time, I’m telling you!
Apply wallpaper paste, being careful to cover all the edges. Fold each end of the strip toward the middle, paste sides together, aligning edges carefully so they do not dry out. Roll the folded strip as you would a loose newspaper, again being careful to keep edges aligned. Allow the folded and rolled strips to “relax” for 2-3 minutes. (this may vary with the type of wallpaper you are working with.) Do not skip this step.  Also, make sure to immediately wipe off any paste you get on the front side of your wallpaper. This will eliminate any chances of the pattern getting ruined.
After letting the paper relax, bring to the wall and hang. Carefully smooth air pockets, wrinkles, or excess paste from center of the strip towards the edges using your flat tool.
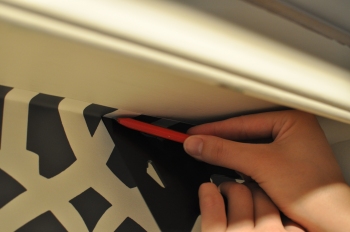
Trim excess at floor and ceiling with a utility knife: use a new blade for each cut. Be sure to wipe off any excess paste from the surface of the strip with a damp sponge immediately. Any residual paste may cause damage to the printed surface.
Repeat the procedure with the next strip, sliding it into position with the edge butted up against the preceding strip. Do not overlap seams.
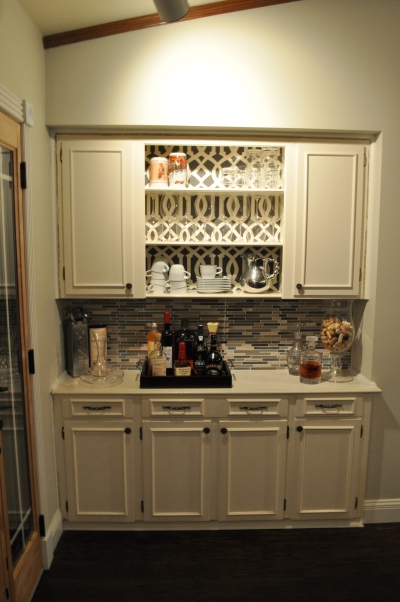
And Repeat. Repeat and Repeat. Full coverage pattern “book” (adhere) in about 10 minutes. (Again this will vary depending on your wallpaper.) Yes, I did the cabinets, too!! It’s so fun to see the pattern continue to each area. Success!
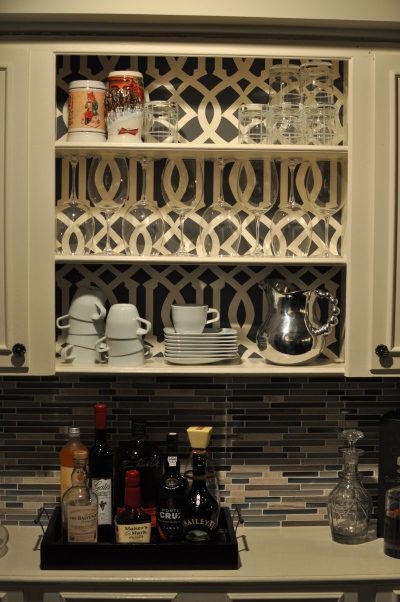
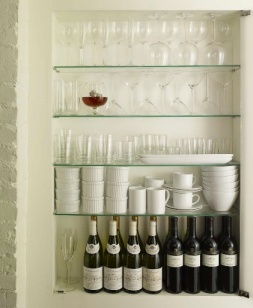
I used this picture for inspiration to organize my glassware: found on Pinterest.
Here’s the before and after together!
And close-ups.
This was a great project, and if you are looking into wallpapering something yourself… Do It! I takes a little time but the wallpaper is forgiving and you’ll do great!
I think I’ll have a little vino to celebrate my accomplishment.

chihuly and the dallas arboretum

I had one of those fabulous, successful weekends, where there was lots on the to-do list and lots more that got done! I started off the weekend by joining some friends at the Dallas Arboretum and marking off another 33 before I’m 33 goal! Yay! We wanted to get out early, before it got too hot to do anything outdoors, which meant I was out the door (on a Saturday) before 8:30 am.  This was new territory for me; I loved it and may continue to get up early! So many people out of their home before noon, who would have thought?!? Ha ha.

The Dallas Arboretum had Dale Chihuly’s amazing glass work on display, so it was even more exciting to see his work amongst all the beautiful foliage. We walked around the park oohing and ahhing at the wonderful sculptures, glass, and plant life.

We also considered that Chihuly’s inspiration may have come from Willy Wonka and The Chocolate Factory.  If only that was the case…  “the strawberries taste like strawberries, and the snozzberries taste like snozzberries”. It made us extra hungry for a great lunch, which Kameron and I had, but Amelia spent her lunch warding off all the elusive birds. Besides the crazy birds, we had a terrific time catching up with each other, surrounded by an amazing background.
All-in-all, it was a wonderful spot to visit, and I plan to go back soon! Here’s a couple extra shots that I really enjoyed!

I’ll leave you with one last photo with a little artistic flair?!? Can you see us?

I hope everyone enjoys exploring their own cities!

family room progress

We’ve been really enjoying our Texas spring; we have to, because the Texas summer is next. In between the beautiful weather, we have been working on the family room. I wanted to share some of our progress.
Here’s the original.

Then, I painted the paneling Benjamin Moore AF-130 Truffle here.

Then I painted the fireplace here.

You would think it was all done, right?

No… we decided to do some renovations, like taking down that paneling I painted!?! Just look at what we found!

Scary! Then, we opened the door from the entry way. It looks like it should have been that way! So much more open and inviting!

We found a kitchen “butler window” in the process of taking down the paneling and drywall! Crazy!?!

We also took down the pillars in the kitchen… then the drywall was put into place!

It looked so open and airy! We decided with all that destruction, why replace the old, leaky sliding glass door, too!

It all came together nicely! I painted the walls Benjamin Moore Early Morning Mist 1528 and have plans to paint/stain/tint the wood beams and some day get reclaimed barn wood to put over them. The lighting needs to be addressed, too!! It’s progress. I also have my eye on a big map for the wall as well! I’ll keep you posted!

In the kitchen, I still want to get long drapes, art on the walls, and a new light fixture.

Progress comes in all shapes and sizes! It’s been really fun revealing our! I hope everyone is having a wonderful week!